Hard Drive Encryption

On a totally different encryption tangent, I need to encrypt my hard drives. Kind of ashamed that they aren’t encrypted already… I studied the field of cyber-security. However, for a basic home server it didn’t seem as pertinent to encrypt my drives.

I’m not going crazy or anything with confidential data. However, something really cool with hard drive encryption is that in most cases (strong password utilized, best practices, etc.), if the user is not logged into the computer at the time of seizure, it can be close to impossible (at the moment of writing this) for forensics to decrypt the data. True, there are tools that are part of the FTK toolkit like PRTK that can be used to attempt to decrypt your hard drive. Now correct me if I’m wrong, but if your password is over 12 characters long and includes different characters, numbers, symbols and all that jazz, the decryption attempt will take forever! The investigators are likely to be long gone before anything is returned (the cracking system would also have to be amazing and last just as long).

There are primarily two types of encryption, hardware and software encryption. I prefer the idea of hardware encryption, it encrypts data at the lowest level and tends to be more secure. If someone has access to your environment with a software encryption scheme there is a greater likelihood they will be able to obtain the key through brute force. A simple reference site for an explanation of encryption and the differences can be found here. One uses the computers resources to encrypt while the other relies on the hardware to encrypt data on its own dedicated processor. There really isn’t much difference between performance, problem is not all hard drives come with a dedicated processor for encryption.

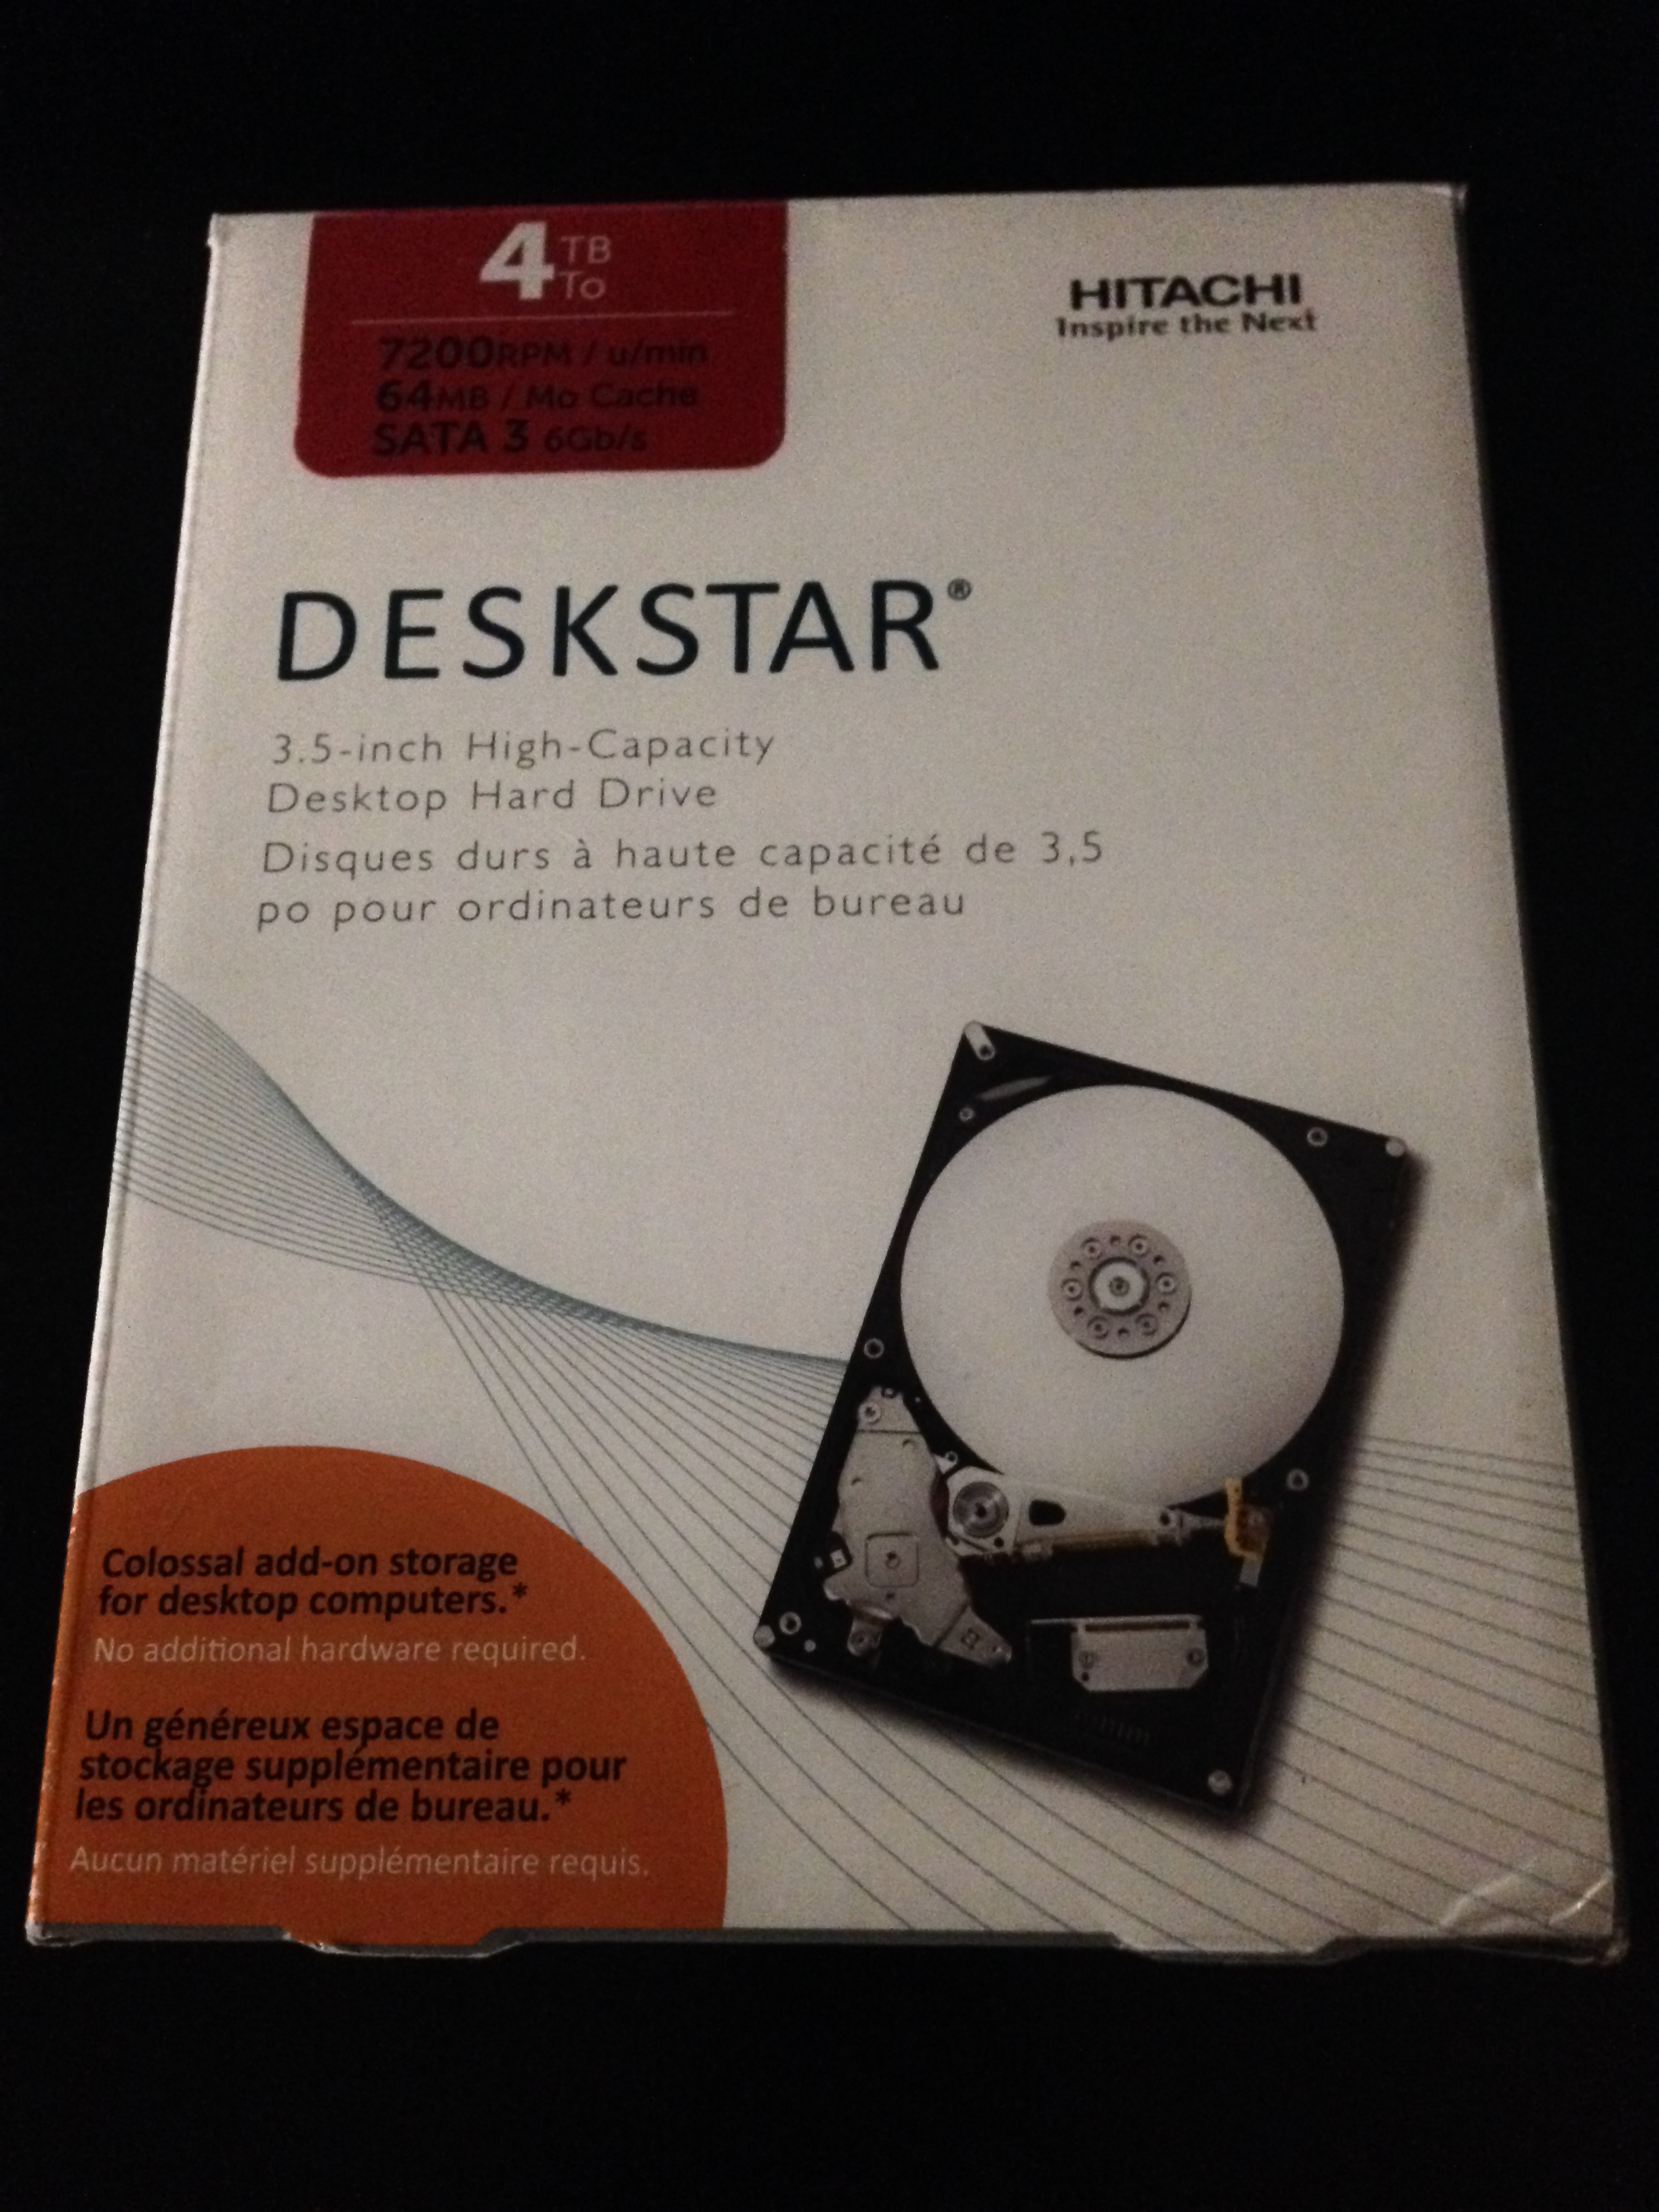
My environment consists of three 4 TB hard drives in a RAID5 array that are currently partitioned into two drives. One drive contains Windows 8 and the other is for storage.

The hard drives I'm currently using.
The hard drives I’m currently using.

So my options, hardware or software encrypt. I’ve already been using the drives for quite some time, I don’t really want to lose the data already stored on the devices. There are some issues I foresee with hardware encryption and a RAID system. Is it even possible with RAID? I have to concern myself with how encryption will affect the stripping and mirroring of data. It all depends on the drive and in my case, its easy, my hard drives don’t even include the capability to hardware encrypt so on to software encryption.

For software encryption, BitLocker and TrueCrypt are two free solutions that I am familiar with and could consider using. I could also look at converting my entire system into a NAS (FreeBSD and FreeNAS can setup a software based RAID and they include encryption capabilities) but… I’ll save that for another day.

BitLocker is already made available on Windows 8 Enterprise and Ultimate, but is it better than TrueCrypt? According to Tomshardware.com, both encryption tools are almost identical in performance. Bottom line, Microsoft’s BitLocker apparently has a few advantages via Intel’s new AES extensions. Despite this, TrueCrypt gives is compatible with non-Windows environments and it allows users to create “secret” partitions. These partitions are totally hidden and are only accessible from the TrueCrypt passphrase screen.

Mmm I think I’ll explore both options. BitLocker is quite easy to setup. From the start screen, type in BitLocker and there it is!

Finding BitLocker

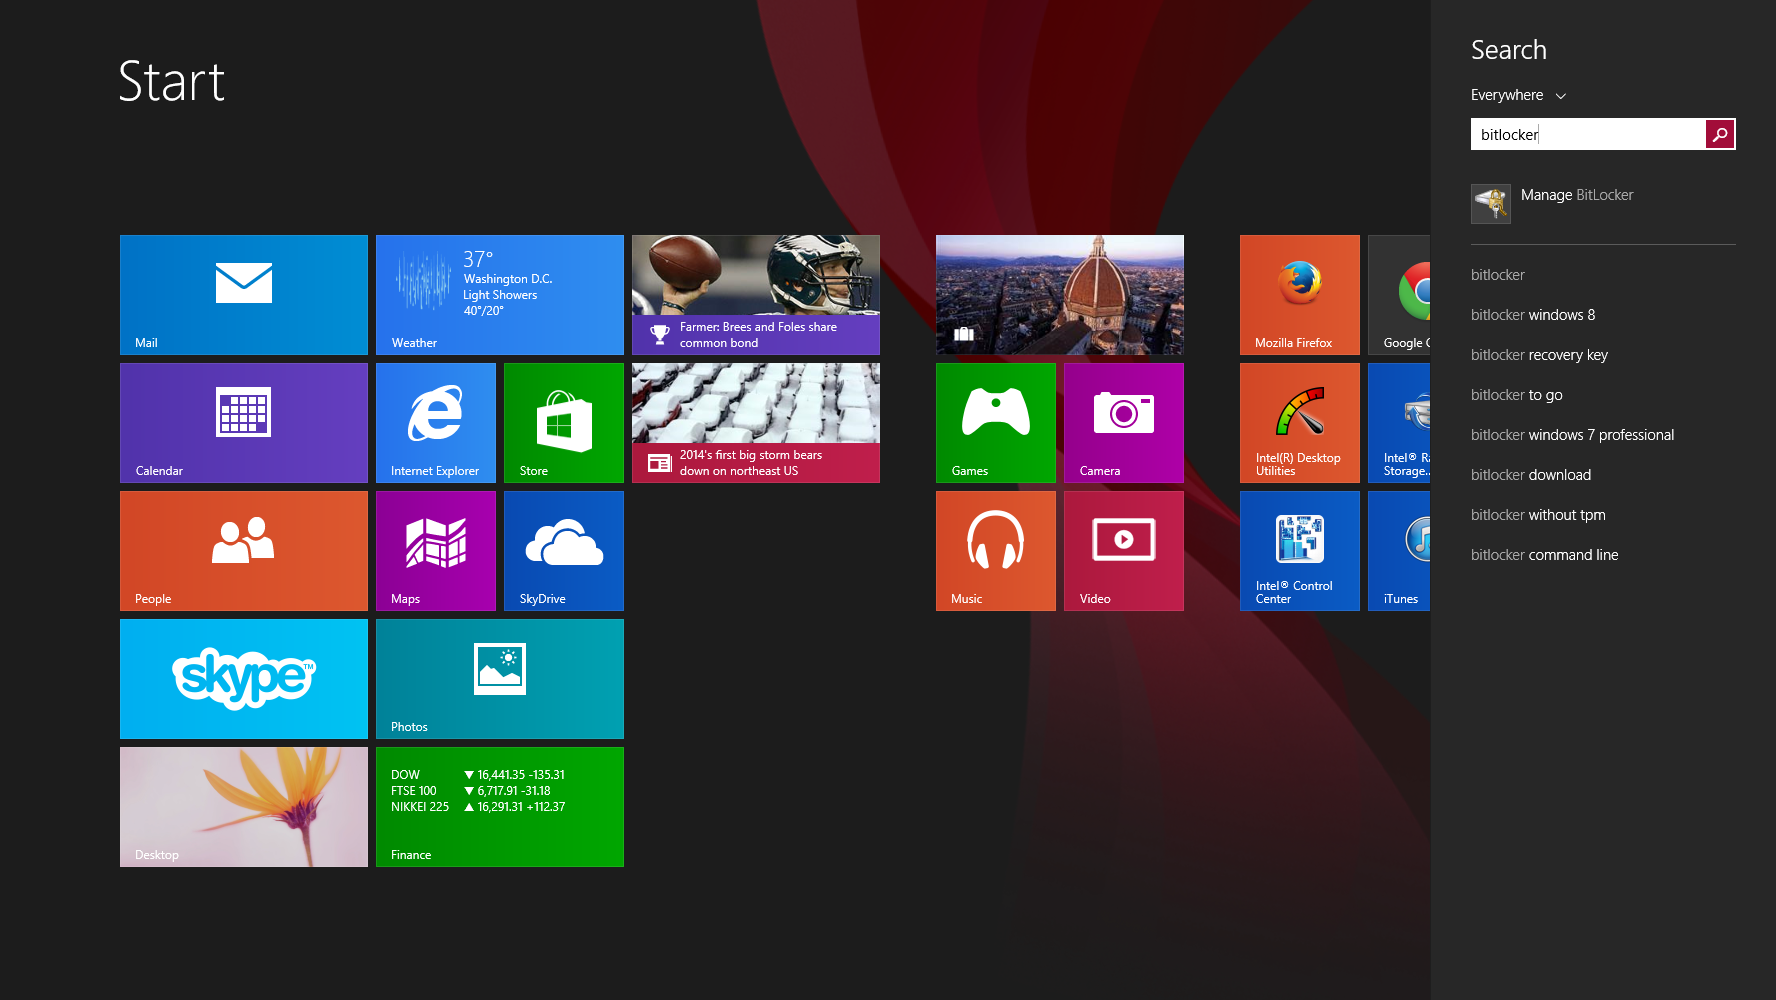
Select to turn on BitLocker and follow the wizard instructions. It’ll take a couple restarts to get things going followed by a long, long wait.
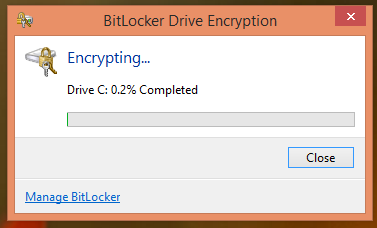
BitLocker

Easy Sauce!

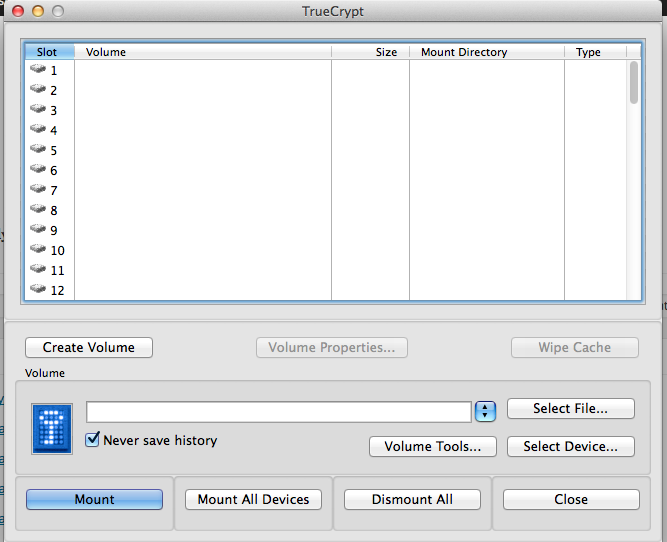
TrueCrypt is slightly different. The install demonstrated was performed on a MacBook Pro with Mavericks installed.

I couldn’t encrypt the working hard drive because it was in use, kind of defeats the purpose of what I was attempting however, I was able to create a hidden/secret partition. So I’m just going with that.

After starting up TrueCrypt, select to “Create Volume.”

TrueCrypt Main Menu

Follow the wizard directions to “Create an encrypted file container.”

Encrypted File Container

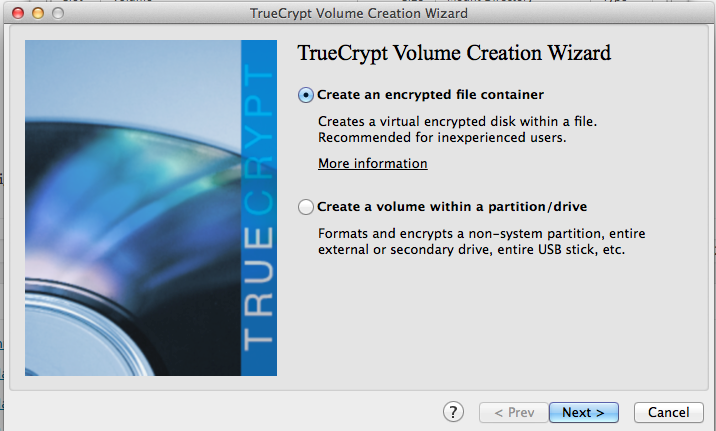
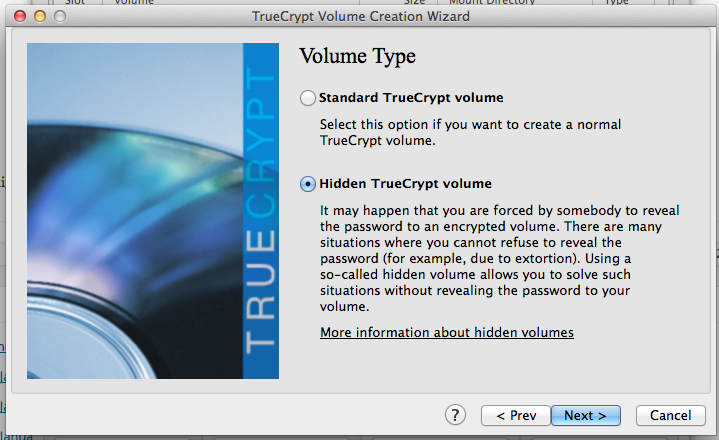
Following, select “Hidden TrueCrypt volume.”

Hidden Drive

Select a file location for the TrueCrypt volume. This volume will appear as a file which can then be mounted by the TrueCrypt software. Once mounted, it can be accessed just like another filesystem with directory trees, files, etc.

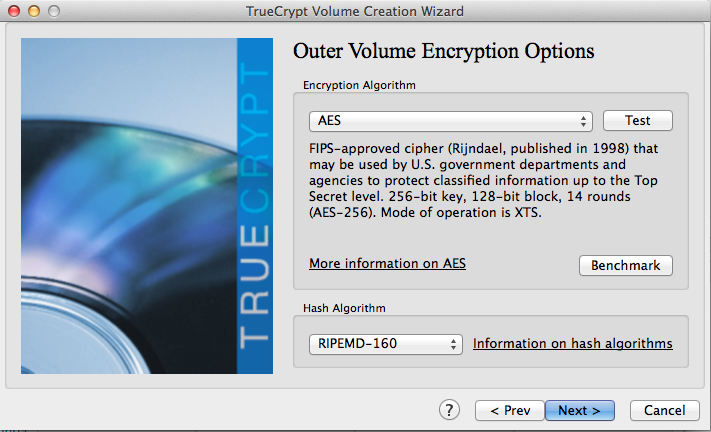
Choose whatever encryption algorithm works for your environment, testing is always a good idea.

Outer Volume Encryption Options

The Outer Volume Format window is slightly peculiar, you just mouse around the window a lot to create a random key sequence.

Outer Volume Format

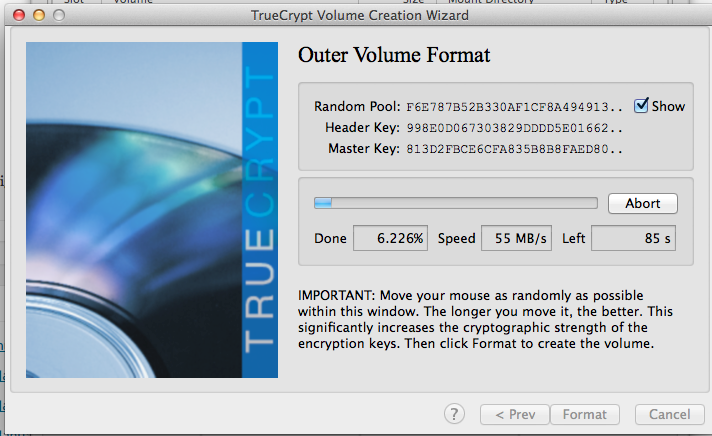
After selecting, “Format,” the outer volume for the hidden/secret partition will be created. This volume contains the hidden and can act as a decoy. The wizard continues with the hidden volume creation.

Screen Shot 2014-01-02 at 6.57.22 PM

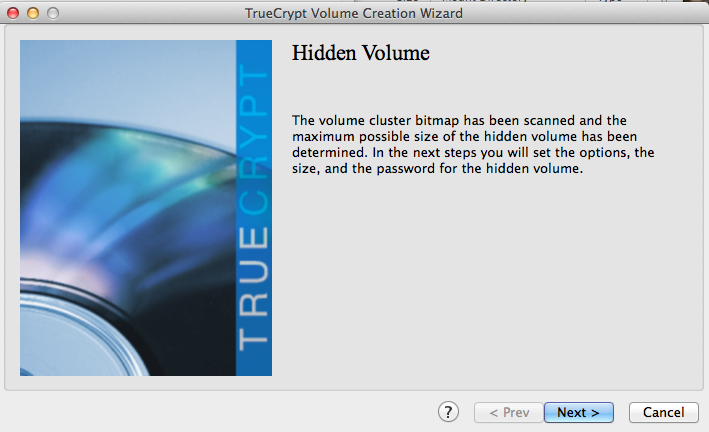
It’s basically identical to the earlier, outer volume process.

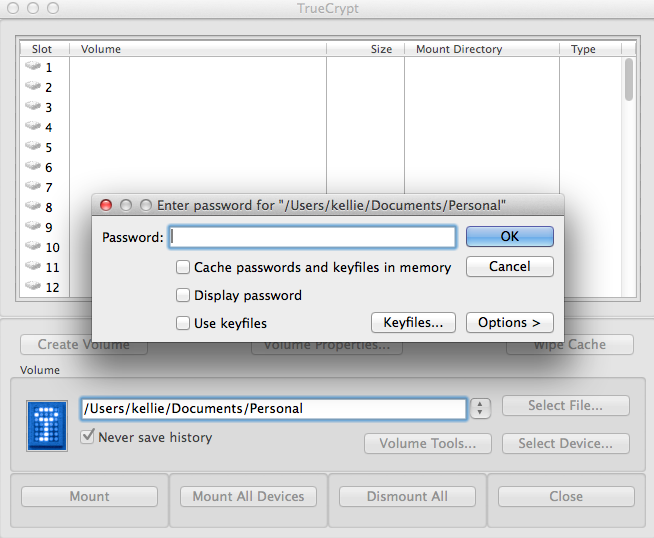
Now to access the two volumes, open TrueCrypt and mount the file you created. You can either enter in the password for the hidden or decoy volume depending on which on you want to access.

TrueCrypt Password Prompt

So why this outer volume/hidden volume setup? Say, somehow, someone knew you had the TrueCrypt volume and they were forcing you to provide the password. Well, thank goodness you have a decoy! They’ll think they’re getting the goods when really you are only supplying them with decoy files, while the hidden ones lay secretly nestled inside the decoy undetected.

Wow, what a long post but there you have it, the joys of encryption!

Decrypting Files by Sound? Part 1

I found this paper recently that discuss how an RSA encryption key can be enumerated by sound. It was written by Adi Shamir, the co-inventor of the RSA algorithm (the ‘S’ in RSA), so the paper seems to be a little more legit than just someone’s paranoia. Basically, the idea is based off of the noises a computer makes when utilizing different levels of power. These noises consist of high-pitched tones that can be detected by the right equipment. Each task performed by a computer requires varying amounts of resources and power therefore a new unique set of tones for a process. So it seems possible that the noises resulting from a machine decrypting a key could be picked up and used to for enumeration.

This is definitely something I would love to test out! However, as of now I don’t have the right equipment but I don’t want to give up on the project yet. Instead, I’ll make baby steps. Encrypt something with RSA.

To be continued…

LIVECAP Project v1.0

There are currently tools made available, such as Windows Forensic Toolchest, which automate a live Windows forensic investigation. However, these tools are private and require a purchasing fee. The Livecap project, started by Francis Mensah, is an open source Windows forensic tool alternative. The tool was entirely developed as a contribution towards anyone interested in the open source forensic community. The tool is publicly available on Google (http://code.google.com/p/livecap-project/).

The Livecap project is a forensic framework intended to simplify the task of forensic live capture. It is designed to automate the live forensic investigation and provide a formatted HTML report of the findings.

Picture1

 All that the user needs to do is specify the source of the tools that will be used in addition to a few configuration details and Livecap does the rest. Livecap adheres to standard forensic practices such as not doing anything that can tamper with forensic evidence on the victim workstation from which information is being captured. Through the use of client/server architecture Livecap transfers all its data from the victim workstation to the forensic workstation via a TCP/IP connection. Where this approach is not feasible the tool also supports other storage means including mounted remote drive and attached USB storage. It is, however, recommended the client/server TCP/IP connection be used with the client being run from a CD ROM on the victim workstation. This guarantees the least interference with forensic evidence.

Best Practices: Windows Live Analysis

There are some instances where a computer cannot be powered off for an investigation. For these circumstances a live incident response is performed. Another advantage to live investigations is that volatile and non-volatile data can be analyzed. The victim machine is the target of these investigations. These best practices are tool specific to Windows machines; however some of the commands will work in other environments.

1.  In performing a digital forensic live incident response investigation it is important to setup the environment correctly. A disk or network drive needs to be created containing executables to the tools that will be used to uncover evidence. Recommended tools include:

    • Sysinternals Suite (http://technet.microsoft.com/en-us/sysinternals) – This contains numerous forensic tools.
    • FPort (http://www.scanwith.com/Fport_download.htm) – This tool enumerates ports and executables running on the ports.
    • UserDump (http://www.microsoft.com/en-us/download/details.aspx?id=4060, Contained in User Mode Process Dumper) – Is used to create memory dumps for specific processes.
    • NetCat (http://nmap.org/ncat) – Create TCP channels between devices that can be used to pass information.

Warning: The reason only executables are used in an investigation is because software installers will write into memory. If incriminating data was deleted, there is still a chance of uncovering it because it is not removed from disk. The only way to completely get rid of data is to overwrite it. There is a chance that software installers will overwrite such data and therefore are not to be used. This is also why live investigations do not involve any type of information writes to the victim machine’s disk (Jones, Bejtlich and Rose).

2.  Since data cannot be written to disk, it is best to map a network drive or use Netcat to transfer information between analyzing machine and the victim machine.

Warning: All files created or tools used need to include a checksum for validation against fraud. A checksum is basically the value of a file hash. If one character in the code or file is changed, the hash will produce a different checksum. This helps validate content. A specific application version will have a unique checksum different from all other versions of the software. A good tool to use to create checksums is File Checksum Integrity Verifier (http://support.microsoft.com/kb/841290).

3.  The first step in the investigation is to retrieve the time and date on the victim machine. It is helpful to have this information when an investigation is carried over multiple devices. Time and date should be compared to a trustworthy server.

Warning: This is very important for time sensitive evidence to be presented in a case (Jones, Bejtlich and Rose).

4.  Current network connections are to be analyzed next to see if there are any unusual connections established to the computer or ports listening. Netstat –an, is a native command that can be used to see these connections. This command also shows all open ports.

Warning: Look for established connections that are not authorized or that are communicating with unfamiliar IP addresses. Ports higher than 515, are not ports normally opened by the operating system and should be flagged as suspicious (Jones, Bejtlich and Rose).

5.  FPort is used to see the executables running on open ports. Unknown processes accessing a port should be flagged as suspicious and analyzed.

6.  On machines older than Windows 2003, NetBIOS were used to label a machine instead of the IP address in a connection record found in the event log. In order to validate the machines identity as unique, the command nbtstat –c can be used.

Warning: Hackers could change the name of BIOS, perform an attack and then change it back to another name. The logs would then show the changed name and not the current, leading investigators to a dead end. This is why it is important to check for a unique NetBIOS name (Jones, Bejtlich and Rose).

7.  It is also important to check the user currently logged into a machine remotely and locally. The Sysinternal tool, PSLoggedOn can perform a check.

Warning: A non-authorized user may be logged in or hijacking an account remotely (Jones, Bejtlich and Rose).

8.  The internal routing table should be examined to ensure a hacker or process has not manipulated the traffic from a device. Netstat –rn can be used to view the routing table. Unfamiliar routes or connections should be flagged as suspicious and used to formulate a hypothesis.

9.  The Sysinternals tool, PsList, can be used to view running processes. Process flagged earlier can be viewed. It should be noted that if another process was found started around the same time as the suspicious process, it should also be flagged. The two processes might have been started by the same attack or service.

10.  The Sysinternals tool, PsService, is used to look at running services. Services that do not contain descriptions are not obvious services maintained by the operating system and are suspicious.

Warning: Services are used to hide attacking programs and should be analyzed carefully (Jones, Bejtlich and Rose).

11.  Scheduled Jobs on a Windows machine can be viewed with the at command. An attacker with the right privileges can schedule malicious jobs to run at designated times.

Warning: A hacker can run a job at odd times, such as 2:00 AM, which would likely go unannounced to most users (Jones, Bejtlich and Rose).

12.  Examining opened files may relay information more relevant to an investigation. The Sysinternals tool, PsFile, is used to look at all remotely opened files that cannot be immediately viewed on the victim machine.

13.  Process dumps are important in reviewing the actions of a process. The tool, UserDump, can be used to create a dump file of a suspicious process.

1

14.  Following, the Sysinternal tool strings can be used to pull out any words sentences found in the dump file. This material can be reviewed to gain an understanding of what actions a process or executable performs.


2

15.  After the volatile information is analyzed, non-volatile information can be examined. This includes all logs, incriminating files stored on the system, internet history, stored emails or any other physical file on disk. Manual investigation can be used to review this material.

16.  When performing a live response investigation, it is import to be paranoid and research anything that is not obviously a familiar service, process, file or activity.


Best Practices: Linux Live Analysis

There are some instances where a computer cannot be powered off for an investigation. For these circumstances a live incident response is performed. Another advantage to live investigations is that volatile and non-volatile data can both be analyzed providing more evidence than a typical offline analysis on a hard drive. The victim machine is the target of these investigations. These best practices are tool specific to Linux machines.

1.  In performing a digital forensic live incident response investigation it is important to setup the environment correctly. Linux environments come with a variety of tools pre-installed that are useful in the investigation. However, for additional tools not already installed on the system, a disk or network drive needs to be created containing executables to the tools that will be used to uncover evidence. Recommended tools include:

    • NetCat (http://nmap.org/ncat) – Create TCP channels between devices that can be used to pass information.
    • Native Linux commands and tools (Explained in further detail throughout the guide)
      • Netstat
      • Lsof
      • Ps
      • Lsmod
      • Crontab
      • Df
      • Top
      • Ipconfig
      • Uname
      • Gdb
      • Strings

Warning: The reason only executables are used in an investigation is because software installers will write into memory possible overwriting data. If incriminating data was deleted by a user, there is still a chance of uncovering it because it is not removed from disk. The only way to completely get rid of data is to overwrite it. There is a chance that software installers will overwrite such data and therefore are not to be used. This is why live investigations do not involve any type of information writes to the victim machine’s disk (Jones, Bejtlich and Rose).

2.  Since data cannot be written to disk, it is best to map a network drive or use Netcat to transfer information between analyzing machine and the victim machine.

Warning: All files created or tools used need to include a checksum for validation against fraud. A checksum is basically the value of a file hash. If one character in the code or file is changed, the hash will produce a different checksum. This helps validate content. A specific application version will have a unique checksum different from all other versions of the software. A good tool to use to create checksums is File Checksum Integrity Verifier (http://support.microsoft.com/kb/841290).

3.  If using Netcat to transfer logs the following commands can be used:

Command to setup a Netcat listener on host machine: nc –v –l  –p <PORT> > <LOG FILE>

The port number is any port desired for the Netcat listener to listen on for communication. The log file is just a file for the data to be stored in.

Command to send data from a victim machine: <COMMAND> | nc <IP ADDRESS OF LISTENING MACHINE> <PORT>

Basically the command sends the results of a command performed on the victim machine. <COMMAND> is the command issued on the victim machine. The IP address and port are of the host machine with Netcat listening.

4.  The first step in the investigation is to retrieve the time and date on the victim machine along with some basic system details. It is helpful to have this information when an investigation is carried over multiple devices. Time and date should be compared to a trustworthy server. The date command can be used to retrieve this information.

Command: date

Warning: This is very important for time sensitive evidence to be presented in a case (Jones, Bejtlich and Rose).

Command: ipconfig

Ipconfig retrieves network information such as the machine’s IP address and MAC address.

Command: uname –a

This command retrieves information such as a systems hostname and operating system version.

5.  Current network connections are to be analyzed next to see if there are any unusual connections established to the computer or ports listening. Netstat is a native command that can be used to see these connections. This command also shows all open ports.

Command: Netstat –an

Warning: Look for established connections that are not authorized or that are communicating with unfamiliar IP addresses. Ports higher than 900, are not ports normally opened by the operating system and should be flagged as suspicious (Jones, Bejtlich and Rose).

6.  Lsof is a native command to Linux that stands for “List Open Files.” It can be used to see the executable processes running on open ports and it displays files that processes have opened. Unknown processes accessing a port should be flagged as suspicious and analyzed.

Command: lsof -n

7.  The Linux command ps can be used to view running processes. Suspicious processes flagged earlier can be viewed in more detail. It should be noted that if another process is found having started around the same time as the suspicious process, it should also be flagged. The two processes might have been started by the same attack or service.

Command: ps -aux

8.  It is also important to check the user currently logged into a machine remotely and locally. The users command can be used to see logged in users.

Command: users

Warning: A non-authorized user may be logged in or hijacking an account remotely (Jones, Bejtlich and Rose).

9.  The internal routing table should be examined to ensure a hacker or process has not manipulated the traffic from a device. Netstat can be used to view the routing table. Unfamiliar routes or connections should be flagged as suspicious and used to formulate a hypothesis.

Command: Netstat –rn

10.  The lsmod command can be used to view all loaded kernels.

Command: lsmod

Warning: There is a chance that a kernel could have been trojaned, if this is the case it can be discovered from viewing all loaded kernel modules (Jones, Bejtlich and Rose).

11.  Scheduled Jobs on a Linux machine can be viewed with crontab. An attacker with the right privileges can schedule malicious jobs to run at designated times. A simple for loop command can be used to see the jobs each user has scheduled.

Command: for user in $(cut -f1 -d: /etc/passwd); do crontab -u $user -l; done

Warning: A hacker can run a job at odd times, such as 2:00 AM, which would likely go unannounced to most users (Jones, Bejtlich and Rose).

12.  Mount or df can be used to see all mounted file systems.

Command: df

Warning: Hackers can mount a file system as a way to transfer data to the victim machine.

13.  The top command can be used to show all services running. Foreign services should be marked as suspicious and researched.

Command: top

Further service startup scripts can be seen in the /etc/init.d directory.

Command: ls /etc/init.d

14.  Process dumps are important in reviewing the actions of a process. A live dump file of process activity can be found in the proc. Following, the string command can be used to pull out any words or sentences found in the dump file. This material can be reviewed to gain an understanding of what actions a process or executable performs.

Command to find process and memory block: cat /proc/<PID>/maps

The picture below highlights where addresses for a piece of memory can be found in /proc/<PID>/maps

Capture

Command: gdb –-pid=<PID>

dump memory <NETWORK DRIVE LOCATION TO WRITE MEMORY> <ADDRESS RANGE>

Ex: dump memory /mnt/test 0x75d5000 0xb77c8000

Command: strings <NAME OF DUMP FILE>

15.  After the volatile information is analyzed, non-volatile information can be examined. This includes all logs, incriminating files stored on the system, internet history, stored emails or any other physical file on disk. Manual investigation can be used to review this material.

16.  When performing a live response investigation, it is import to be paranoid and research anything that is not obviously a familiar service, process, file or activity.

Jones, Keith J., Richard Bejtlich, and Curtis W. Rose. Real Digital Forensics. Upper Saddle River (N. J.): Addison-Wesley, 2006. Print.

Overview of Basic Windows Live Investigation Tools

These are tools I have used for a live investigation of a target Windows machine and I recommend to other users. These tools are open source and provide clean GUI or command line executable.

Sysinternals Suite contains numerous forensic tools for a Windows environment. A few helpful tools for a live investigation include:

    • PSLoggedOn – Check the users currently logged into a machine remotely and locally, a non-authorized user may be logged in or hijacking an account remotely and this tool will display the account.
    • PsList – View running processes,  if a process was found started around the same time as the suspicious process, it should also be flagged as suspicious  The two processes might have been started by the same attack or service.
    • PsService – Look at running services, services that do not contain descriptions are not obvious services maintained by the operating system and are suspicious.
    • PsFile – View all remotely opened files that cannot be immediately seen on the victim machine.
    • Strings – Used to pull out any words sentences found in a target file.

FPort is a tool that enumerates ports and executables running on the ports. Unknown processes accessing a port should be flagged as suspicious and analyzed.

UserDump  is a tool used to create memory dumps for specific processes. Process dumps are important in reviewing the actions of a process. After the dump file is created the Sysinternal tool strings can be used to pull out any words sentences found in the dump file. This material can be reviewed to gain an understanding of what actions a process or executable performs.

File Checksums

All files created or tools used in a forensic investigation need to include a checksum for validation against fraud. A checksum is basically the value of a file hash. If one character in the code or file is changed, the hash will produce a different checksum. This helps validate content. A specific application version will have a unique checksum different from all other versions of the software.

A good tool for Windows to use to create checksums is File Checksum Integrity Verifier (http://support.microsoft.com/kb/841290). Tool use is very simple.

Command: 
<File Checksum Integrity Verifier EXECUTABLE> <FILE TO CHECKSUM>

Capture4
A good tool pre-installed in most Linux environments to use to create checksums is md5sum.
Command: 
md5sum <FILE TO CHECKSUM>

Ncat for Live Incident Response

When a system is vital in daily operations, it often cannot be taken offline for duplication. Also because of its importance it cannot risk the chance of state change, forensic tools cannot be downloaded onto the system. In a court case, the installation of tools could be considered as tampering with the evidence because there is a chance the tools could overwrite important data. The same goes for saving data on the victim machine. A live incident response looks to collect data from a machine without changing the environment. I recommend mapping a network drive or preferably using Ncat to transfer information between analyzing machine and the victim machine during a live investigation.

Ncat comes pre-installed on most Linux distributions and can be called by the ‘nc’ command. For Windows, a portable executable can be downloaded from here.

If using Ncat to transfer logs the following commands can be used:

Command to setup a Ncat listener on host machine: 
Linux: nc –v –l  –p <PORT> > <LOG FILE>
Windows: <NCAT EXECUTABLE> –v –l  –p <PORT> > <LOG FILE>
Capture

The port number is any port desired for the Ncat listener to listen on for communication. The log file is just a file for the data to be stored in on the analyzing host machine.

Command to send data from a victim machine: 
Linux: <COMMAND> | nc <IP ADDRESS OF LISTENING MACHINE> <PORT>
Windows: <COMMAND> | <NCAT EXECUTABLE> <IP ADDRESS OF LISTENING MACHINE> <PORT>
Capture2

Basically the command sends the results of a command performed on the victim machine to the listening host machine. <COMMAND> is the command issued on the victim machine. The IP address and port are of the host machine with Ncat listening. The connection can be closed by CONTROL C/D or closing the terminal/command prompt. Once closed, the listener will output all received data to the output file.

Not only can Ncat be used to send command output but it can be used to listen for text or file transfers.

Capture3


Overall, it is an easy to use clean tool for transferring information between host machines.

Recovering Data with Autopsy

A little while back, a friend brought a USB to me and asked if I could attempt to retrieve any data off the device. After some research, I found the open source tools, autopsy and Sleuthkit, that can be used for recovering data. I found these tools very helpful in retrieving deleted data off a drive. The web interface is not the easiest to use but it is still an effective recovery tool.

Autopsy is a web user interface tool that utilizes the Sleuthkit forensics toolkit. Backtrack comes with Autopsy and Sleuthkit already install but for any other Debian based Linux system, they can be installed with:

sudo apt-get install autopsy
sudo apt-get install sleuthkit

Autopsy will perform forensics on a disk/storage image file. Anything from an image of a hard drive partition to a USB device. An image file can be created of any mounted drives. In Linux, to view current mounted drives use the command:

fdisk -l

The system column provides a description of the drive. The last item printed is that of an attached USB. Once, the desired drive to perform forensics on has been located, create an image of it.

dd if=<Device Boot Location> of=<Saving Location>.img bs=2048
Example: dd if=/dev/sdb1 of=usb.img bs=2048

This will take a few minutes.

On Backtrack R1, when first trying to run Autopsy (typing ‘autopsy’ in the terminal), I ran into an error saying autopsy was not installed.

This happens if autopsy does not have an initialized evidence locker. Find and run autopsy from the Applications->Backtrack->Forensics under Forensic Suites. A new terminal will open prompting for the full path to an evidence locker location. A valid/existing location has to be given or else autopsy will error again.

When autopsy is successfully running, it will begin servicing a website user interface that can be accessed in a browser by going to:

http://localhost:9999/autopsy

On this webpage, choose to create a new case. Autopsy will ask background questions on the forensic case. Since this is most likely for personal use, these questions do not matter. Fill them out however you like.

Continuing, once prompted for an image file, enter the full path location to the one created earlier. Depending on what type of storage image, select Disk or Partition. When I performed this I was analyzing a USB image and selected partition. The third question asks for the desired type of import. Choose whichever method you prefer. I like to use Symlink.

Following, the data integrity section can be ignored. The last section needs to be verified. Check to make sure the file system type is correct. Then complete the process and add the case.

Now the image can be searched for lost files. Choose to “Analyze” the image. Then select “File Analysis” from the top left of the window. If this button is disabled, it is most likely the wrong image type was selected (Disk or Partition). Re-create the case and choose the other option. File Analysis, provides a view of all files and directory contents found on the image. Now you can search through the files and ideally find the lost file to recover. Once it is found, the file can be exported to your local system.

Good Luck! This is just one method of data recovery.

I received the most help from this article in performing this type of forensics.