After using ccmake to configure ParaView options, I received the following errors while running ‘make.’
In file included from ...X11/Shell.h:51:26: error: X11/SM/SMlib.h:
No such file or directory
and
...VTK/Rendering/OpenGL/vtkXRenderWindowInteractor.h:39:73:
error: X11/Intrinsic.h: No such file or directory
and
In file included from ...Wrapping/ClientServer/
vtkXRenderWindowInteractorClientServer.cxx:6:
VTK/Rendering/OpenGL/vtkXRenderWindowInteractor.h:38:74:
error: X11/StringDefs.h: No such file or directory
VTK/Rendering/OpenGL/vtkXRenderWindowInteractor.h:39:73:
error: X11/Intrinsic.h: No such file or directory
In file included from ...Wrapping/ClientServer/
vtkXRenderWindowInteractorClientServer.cxx:6:
Solution
These issues were due to my libraries being installed in custom locations. Double check all paths supplied in the ccmake configuration and try copying the libxt (X11/all file contents), ICE (X11/ICE), SM (X11/SM) library directories into VTK/Rendering/OpenGL/X11 within your build directory. The error occurred because the compiler could not find the requested libraries.
Untar the file, the following command will work when executed from the same directory the tar file is located.
tar -xvf cmake-3.0.0.tar.gz
Next, change directories into the newly tar-ed folder (the source code directory).
cd cmake-3.0.0
The following commands need to be executed within the source directory. Some source codes have and autogen.sh file. If this exists, run it to auto generate the correct configure.
./autogen.sh
However, if there is already a configure file (note this is not configure.<EXTENSION>), run that to check and setup your environment.
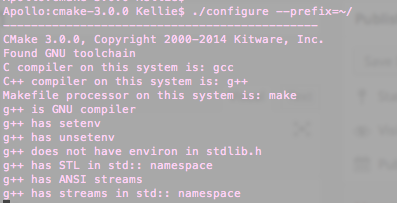
./configure
The command
./configure --help
will show you the manner different setup variables you can assign values. For example, if you do not want the source code to be compiled in default directories, add the –prefix flag to specify another directory.
./configure –prefix=<DIRECTORY FOR INSTALL>
Some sources require you to run
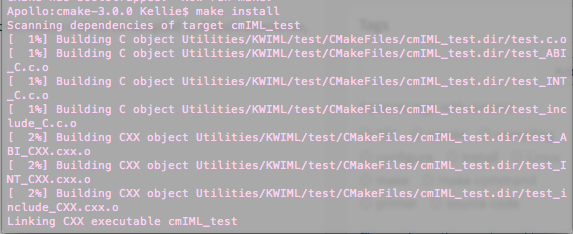
make
first to run/setup default variables. However, I normal just run
make install
in most instances, after configuring.
That’s pretty much it! It is compiled and ready to go. Happy coding!
Django comes packaged with a lightweight python server. It is not intended to be a production server but more a testing/development host. Running the server is as easy as running the following command within a Django project:
python manage.py runserver
Since it’s so lightweight, it doesn’t come with the same abilities as other servers like Apache or Nginx. It can’t perform encryption, however, there’s a nifty tool called stunnel that can do it for you!
“Stunnel is an open-source multi-platform computer program, used to provide universal TLS/SSL tunneling service” (Wikipedia).
Environment
The following steps were performed on my iMac running OS X Mavericks with a Django 1.5 installation. I believe my instructions should still work for different versions (most) and Linux distributions.
Steps
Initially, I downloaded the latest version of Stunnel, however I ran into numerous compiling issues. One of them being: “ld: warning: directory not found for option ‘-L/usr//lib64.’” The error indicated I did not have the necessary 64x library. When I downloaded version, 4.54, everything compiled nicely.
Open a terminal window and run the following command to untar (unzip) the file.
tar –xvf stunnel-4.54.tar.gz
Run the following commands to enter the directory and install the tool (credit).
cd stunnel-4.54
./configure && make && make check && sudo make install
During the install stage, you will be required to enter in certificate data. Stunnel will conveniently make a self-signed SSL certificate for you and save it to /usr/local/etc/stunnel/stunnel.pem. Thanks Stunnel!
Create a configuration file for Stunnel (credit). I put the file inside my Django project to keep things organized.
vim dev_https
Edit the file and add the following lines in order to manipulate Stunnel to work with your environment.
[https]
accept=<HTTPS ACCEPTING PORT>
connect=<LOCAL PORT YOUR DJANGO SERVER IS USING>
TIMEOUTclose=1
Save the file (For vim: ESC ‘:wq’ ENTER).
Start the Stunnel HTTPS tunneling service.
sudo stunnel <PATH OF dev_https>
Next, start your Django server.
python manage.py runserver 127.0.0.1:< LOCAL PORT YOUR DJANGO SERVER IS USING>
Note – I used 127.0.0.1 purposefully as my hosting IP address, I only want Django to run locally. I do not want the server to run on a public/accessible IP. Only stunnel will receive web requests.
That’s it! Now stunnel is listening for all encrypted, incoming messges on whatever port you specified. When a request comes in, it will decrypt it and send it locally to your Django server. Following, Django will then respond through the tunnel to the requesting client with the proper data.
Today, I wish to speed up my Raspberry Pi, it’s just too slow in opening up applications and jazz. After a google search on common ways to speed up your Pi I accumulated the following list of improvement methods:
Ensure you have the right type of SD card for the load, SDHD is good
Make sure you are getting the most out of you SD card by maximizing the partition. (I explained how to do this in this post)
Kill X applications, or the GUIs such as the desktop (In my case, I want the GUI so that’s not going to happen)
Use insserv –r to remove unwanted startup or init scripts
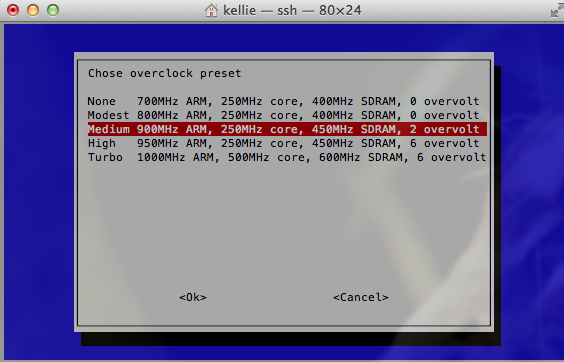
Overclock the sucker!
Overclocking
According to Wikipedia, “…overclocking is the process of making a computer or component operate faster than the clock frequency specified by the manufacturer by modifying system parameters.”
WARNING: Before overclocking your Pi be warned that power consumption may increase. You should be using a quality power supply, such as a wall adapter. Also, your Pi may emit quite a bit of heat depending on how high you clock it. It would be wise to consider a fan or something to regulate the temperature of the device.
I followed the tutorial here quite a bit during my experience of dealing with Pi overclocking.
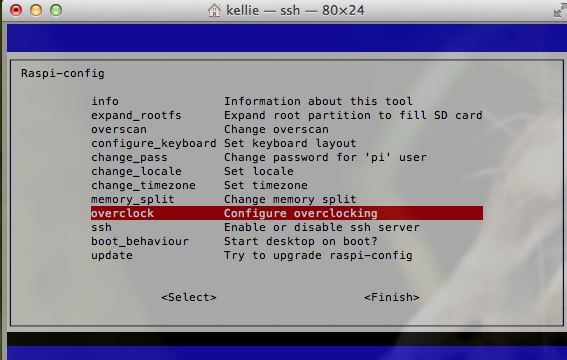
Basically, I used raspy-config, I explained how I installed the configuration tool on Kali here.
Command:
raspi-config
This will open up the Raspbian configuration menu.
From the menu, select overclocking and choose your desired setting. Take the warning seriously, overclocking your system can shorten its life or even prevent the thing from starting up. Take things slow!
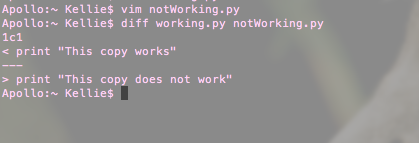
I’ve been doing a log of programming at work and some of the worst errors to run into are segfaults or segmentation faults. This deals with problems in your logic and more often then not is a memory issue. They really suck to debug…
For best practices, I keep a working version and development version of code. This way, when I run into these problems I can compare my issues against a working copy. I use none other than the great diff command. This sometimes helps with faults among other debugging tools like (gdb).
It’s pretty obvious by the name what this command does, it points out the differences between files.
Command:
diff <FILE 1> <FILE 2>
The example points out a line that is different between two given files. New lines can really screw up the results so be careful.
That’s the gist, visit the it’s man page for more details.
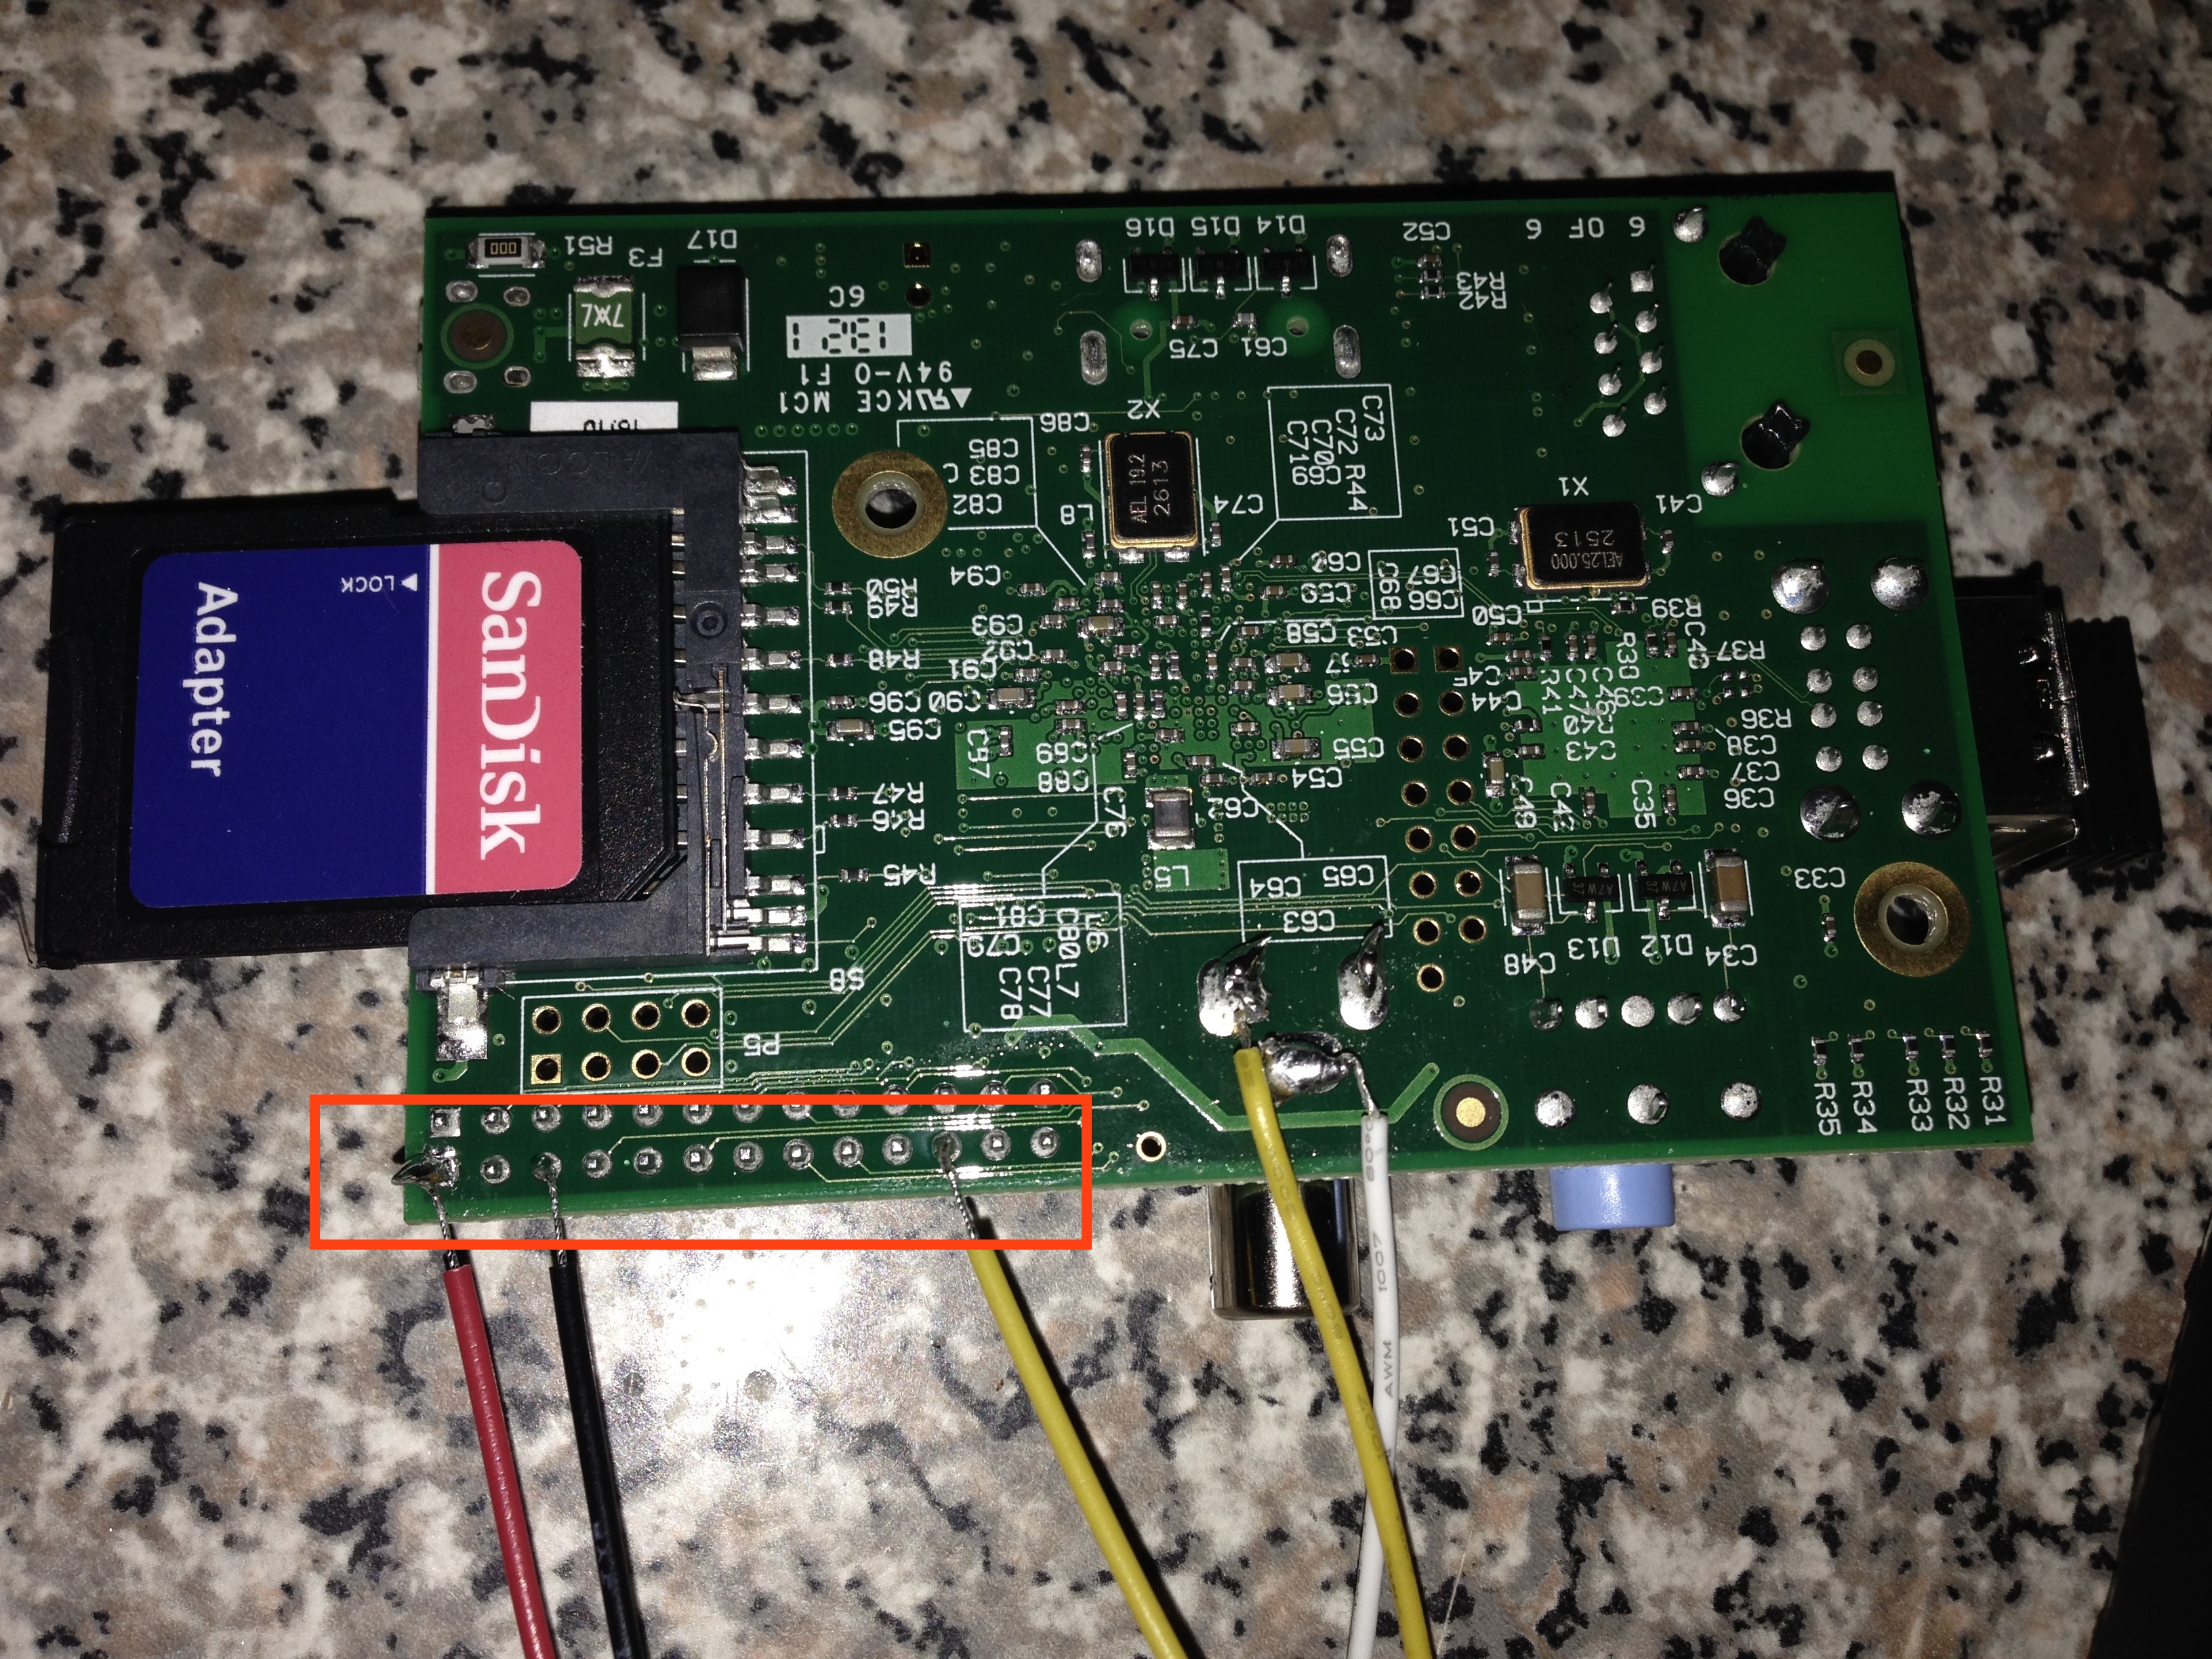
Today I soldered a PIR sensor to my Pi! Basically, I want it to detect movement and turn on a LCD screen, then turn the screen off again after a minute of no movement. So when I walk into a room, the screen turns on and when I leave, the screen turns off.
First thing, I looked up the pinout for the Raspberry Pi. The below diagram comes from elinux.org.
We care about one of the 5V, ground and GPIO25 pins.
Solder the sensor red cable to either 5V.
Solder the black cable to ground.
End by soldering the yellow line to GPIO25.
Your results should be similar to my picture below.
Next, I used this guy’s pir.py script. The script requires the Python library RPi.GPIO. I installed this by downloading the library from here, the direct link is here. To untag or unzip the file I used the following command:
tar -xvf RPi.GPIO-0.5.4.tar.gz
Before installing it, make sure you have python-dev installed.
apt-get install python-dev
With that necessary package, install RPi.GPIO.
cd RPi.GPIO-0.5.4
python setup.py install
Now you can run the pir.py script. I made some slight changes to his code. I didn’t feel the need to call separate scripts to run a single command so I made the following edits.
Run the script and test it out! The sensor will turn off after a minute of no movement and on again once it detects something. I ended by setting my script to run on startup.
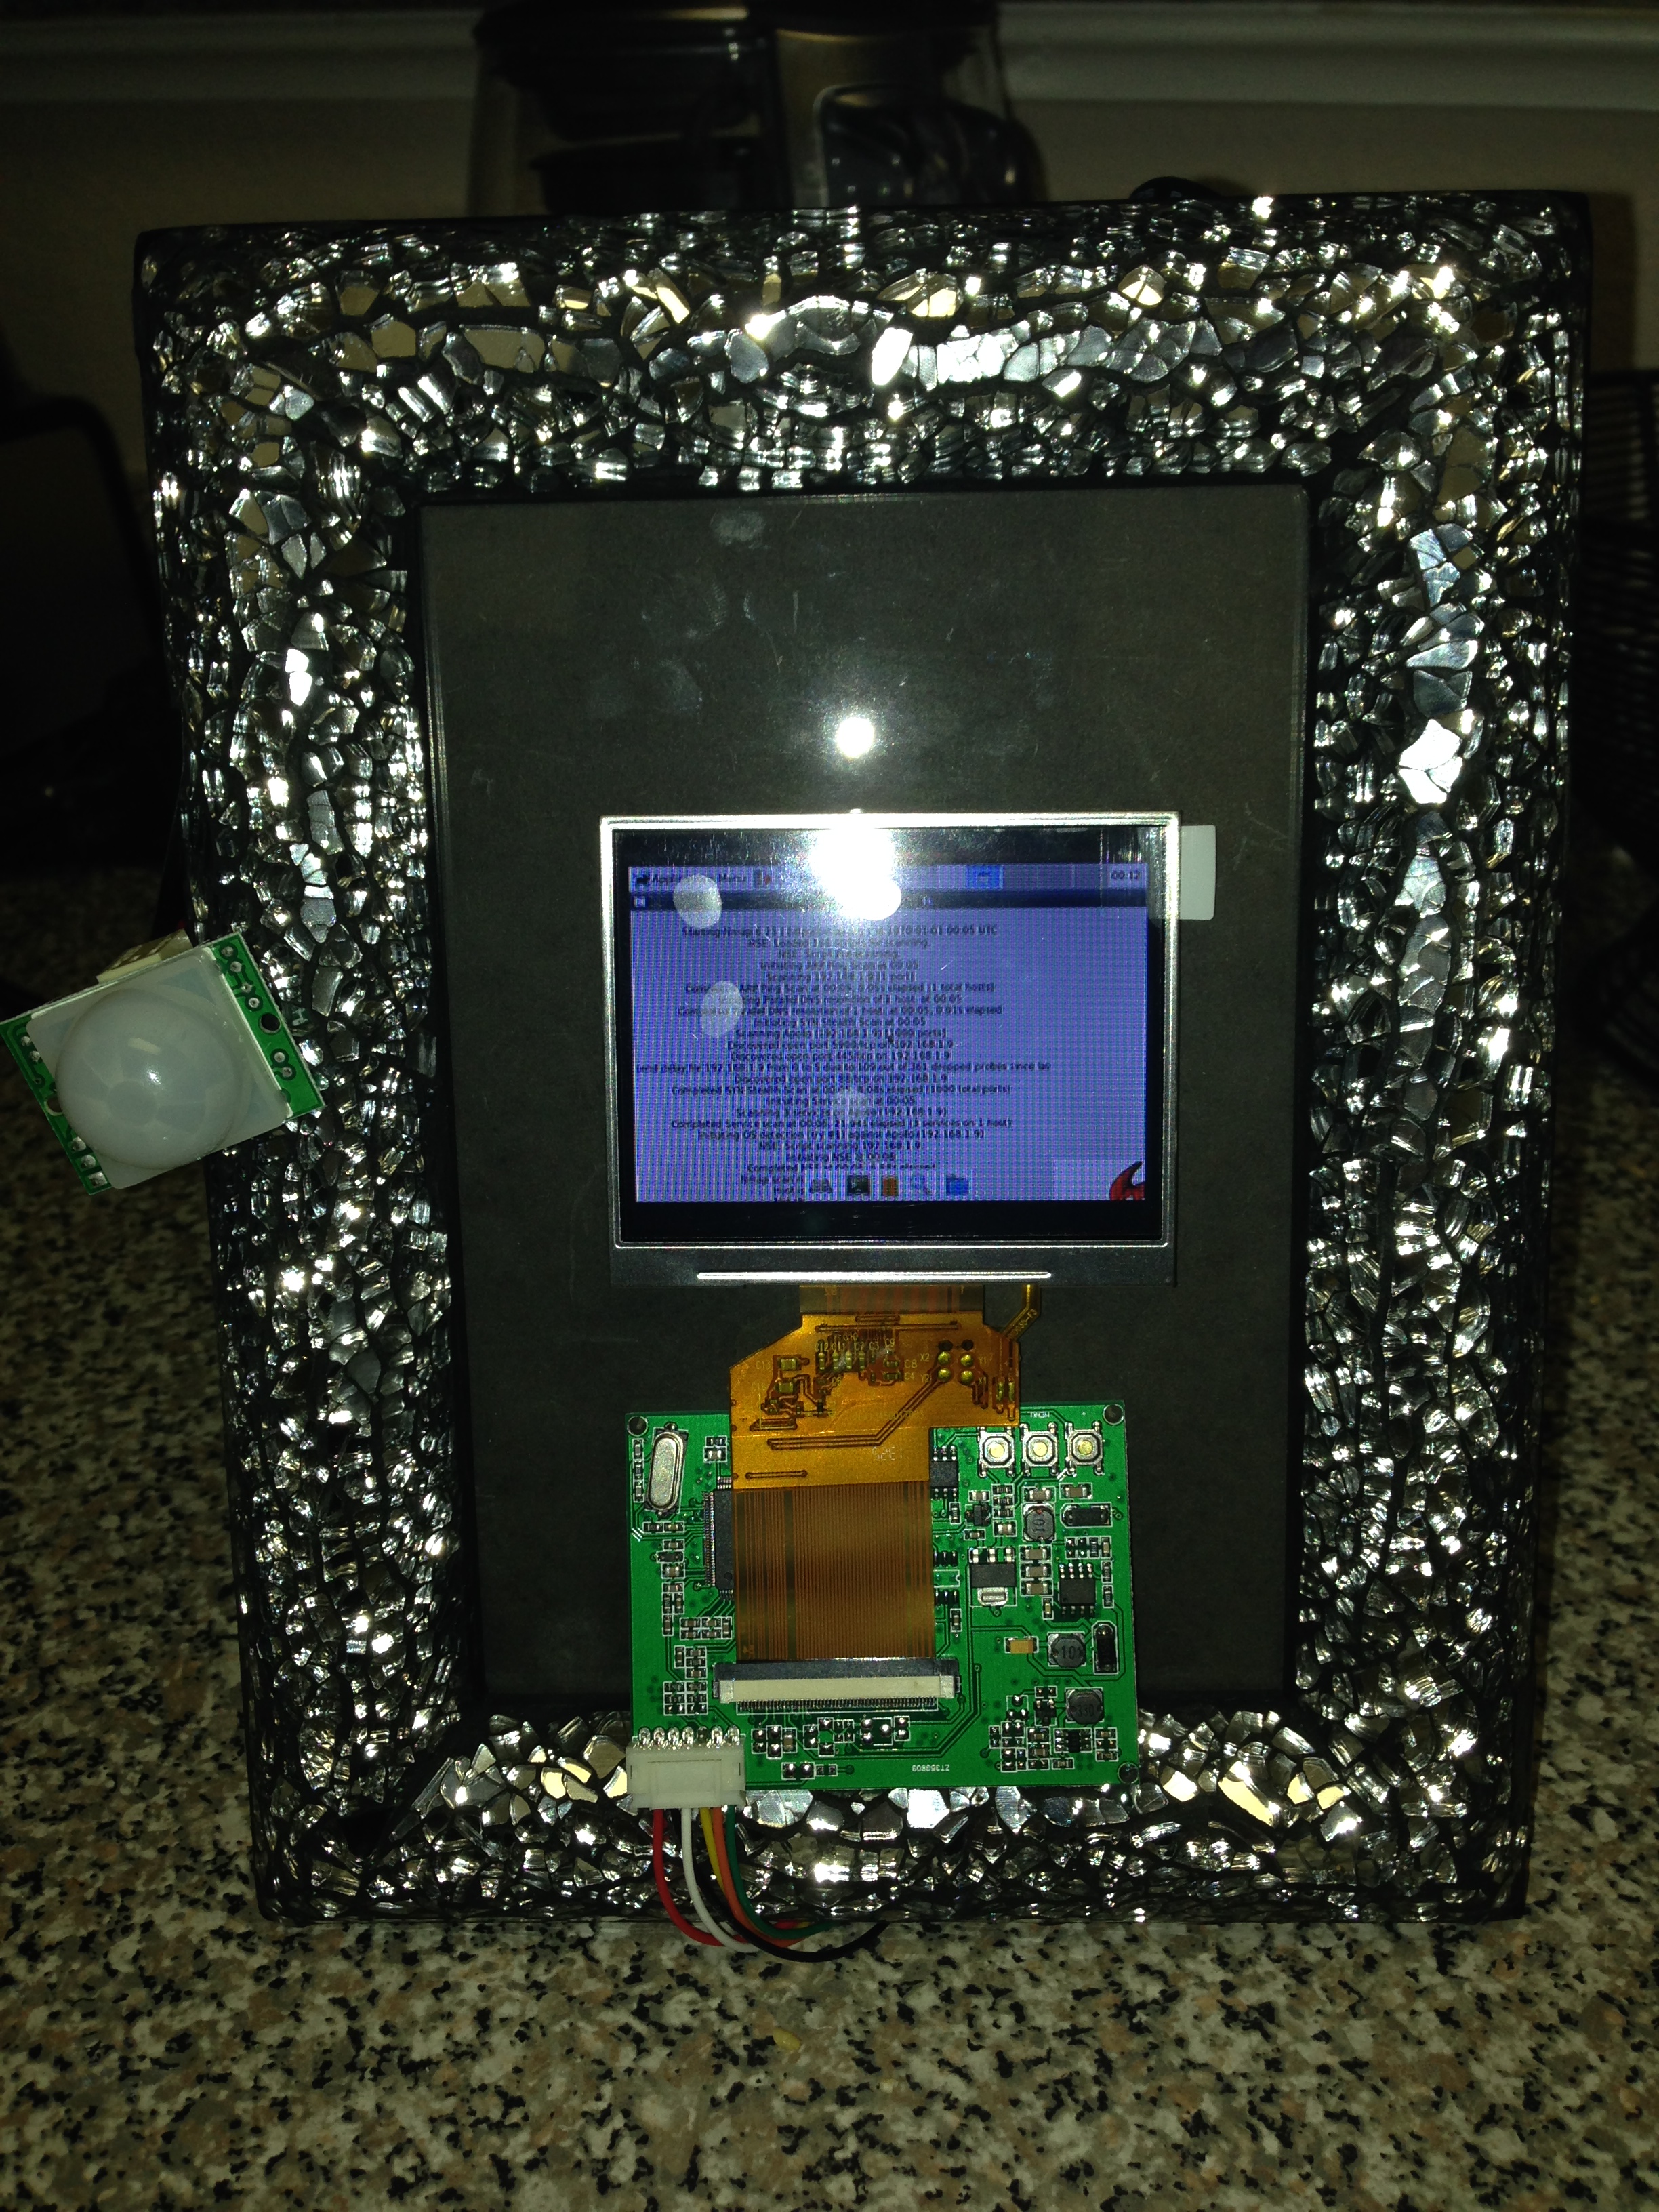
I need to put a picture in the frame to act as background to the pi…
I love using screen at work, especially while I’m in a PuTTy session. Basically, screen lets you open up another bash session without disrupting a current bash session in the same window. So I can open one PuTTy session and with screen emulate multiple. This is nice because I can do something different in each screen session without loosing my place in another. Trust me, it’s awesome.
Install
To download:
apt-get install screen
or (depends on your distribution and packet manager)
yum install screen
Use
Create a screen by typing the command:
screen
Super easy, to detach from a screen:
press CTRL+”a”+”d”
Now what? There is now a floating screen session someone. How do you reconnect to it? First you can list all screen session with:
screen -ls
With knowledge of what screens exist, you can reconnect to one with the command:
I decided to make my own init.d script for my lilDevil app (instead of using a startup cronjob). The “init” in init.d stands for initialization and the “.d” indicates the script is a daemon process. A daemon process is commonly defined as simply something that runs in the background. So an init.d script, is one that is called on startup and runs in the background without any user controls.
And by startup I mean apps that run on Startup 😉
Setup
Making an init.d script is simple. First create the script in the init.d directory.
vim /etc/init.d/<NAME OF YOUR STARTUP SERVICE>
Next, add executive privileges to the script.
chmod +x /etc/init.d/<NAME OF YOUR STARTUP SERVICE>
Now it’s time for the inner-workings.
Script Parts
This is ultimately a bash script so it requires this little sh-bang at the top.
#!/bin/bash
Next, a service requires a LSB header. This header is used to configure startup settings and describe the service. This tutorial goes into detail on the different available settings that can be included in the header. Below is a sample of a more basic header that will add a service to the end of the startup boot order sequence.
### BEGIN INIT INFO
# Provides:          <SERVICE NAME>
# Required-Start:    $all
# Required-Stop:     $all
# Default-Start:     S
# Default-Stop:      0 1 6
# Short-Description: <LONG DESCRIPTION OF SERVICE>
# Description:
<SHORT DESCRIPTION OF SERVICE>
### END INIT INFO
The following code describes the different service actions. For instance, common actions are “start”, “stop”, “restart”, etc.
case "$1" in
<ACTION1>)

<COMMANDS/SCRIPTS TO RUN RELATING TO ACTION1>
;;
<ACTION2>)
<COMMANDS/SCRIPTS TO RUN RELATING TO ACTION2>
 ;;

<REPEAT AS NECESSARY>
Concluding, we exit and clean everything up.
exit 1
esac
exit 0
Putting it All Together
To help you see the big picture, here is a copy of my init.d script.
#!/bin/bash
#
### BEGIN INIT INFO
# Provides:          lilDevil
# Required-Start:    $all
# Required-Stop:     $all
# Default-Start:     S
# Default-Stop:      0 1 6
# Short-Description: Unleash the lilDevil
# Description:       lilDevil is an awesome network enumeration tool
### END INIT INFO
#
With the script completed, we pass it to insserv to be added to the Linux service boot order.
insserv -d /etc/init.d/lilDevil
Tah Dah! The service is added!
What about apps with GUIs?
Now, if your app has a GUI involved, it needs to be added to the desktop environment initialization. This is different from an init.d script. Init scripts run for the most part before the desktop has been initialized.
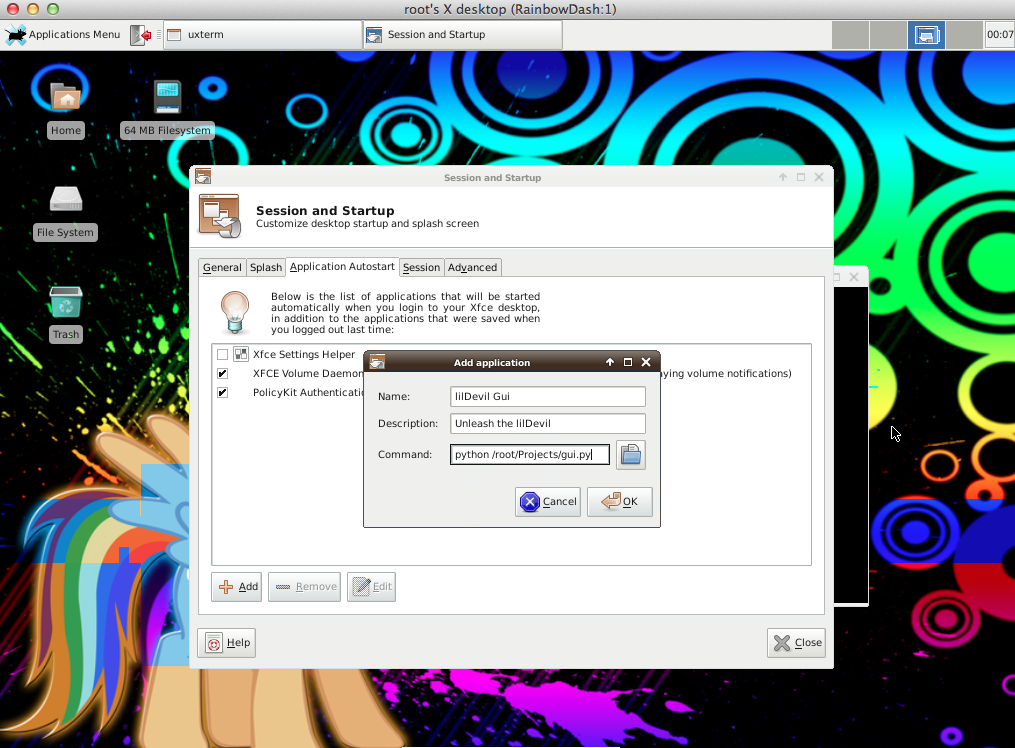
In Kali, I simply used their tool to add the service to startup. The tool can be found under Application Menu->Settings->Session and Startup. Under the Application Autostart tab, you can add a new command to run when the desktop loads.
To get VNC running, you just need to install the tightvncserver package.
sudo apt-get install tightvncserver
Then to run, use the following command.
tightvncserver
After running the command, the terminal will display the hostname and display VNC is operating on. That’s it! Your pi now has a VNC server running on it. This tutorial goes into detail on how to set it to run on startup.