“OpenVAS is a framework of several services and tools offering a comprehensive and powerful vulnerability scanning and vulnerability management solution” (http://www.openvas.org/).
So I’ve been using OpenVAS as an alternative to Nessus and I’ve actually been quite pleased with the tool. The initial installation was a little difficult (see post) but once up and running, it has been great. I haven’t been able to find a simple howto guide on the scanner so I have decided to write one from my own experience with OpenVAS server version 6 and the client tool GSAD version 3.03. I only provide this tutorial as a learning experience and I do not endorse illegal scanning activity.
- I used to GSAD web client interface to interact with OpenVAS once the tool was up and running (see post). I accessed the web interface at http://<OpenVAS IP Address>:<GSAD Port>.
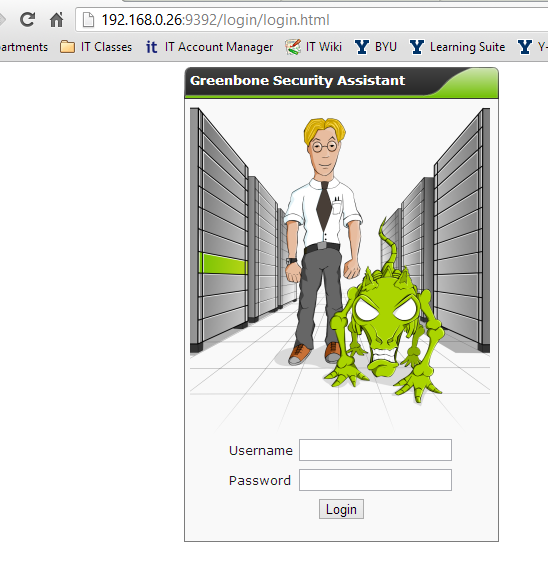
- Log into OpenVAS with credentials created during setup (see post). If you are unable to log in and you know your credentials are correct, its most likely your openVAS database is out-of-date. Try the following steps in a terminal window before attempting to login again:
- Update the openVAS database with the latest definition (This can take an hour or more.): openvasmd –update
- Migrate the database (This can take an hour or more.): openvasmd –migrate
- Rebuild one last time to be safe (This can take an hour or more.): openvasmd –rebuild
- If your server date/time is off this could also cause a problem later on, to correct this you will have to first stop all openVAS processes then change the server date/time to the current. Lastly, you will need to repeat creating the necessary certificates and starting up all the openVAS tools similar to the installation process (see post).
- Upon a successful login, you will be greeted with a window of tasks scheduled and completed.

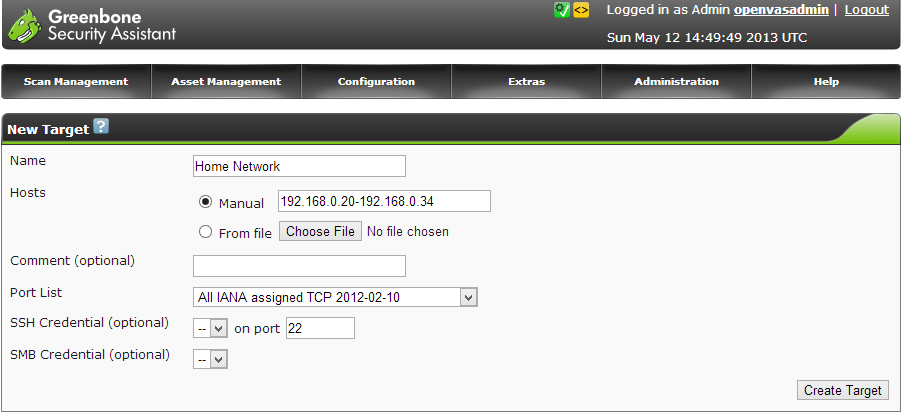
- So for a simple vulnerability scan, you will need to setup a target. This is the machine OpenVAS will scan. By default, the tool has localhost already configured as a target but I’m assuming you will want to scan machines other than the one running OpenVAS. To setup a target, hover over the Configuration tab then select Targets.
- In the next window, fill out the desired target fields. OpenVAS can be scheduled to scan one or more devices. This is determined by the Hosts field, you can either enter one IP address (x.x.x.x) for a singular host scan or a range of addresses (x.x.x.x-x.x.x.x) for a multiple host vulnerability scan. You may find your device can only handle scanning one IP at a time (This is what I found true on my Raspberry Pi). It is a best practice to always scan by IP addresses, a domain name can resolve to multiple hosts and provide conflicting results. In the picture below, I only entered into the form a target name and a singular IP address, everything else I left as default (you can experiment around with the settings for a more detailed scan). When you are finished entering in all the details, create the target by selecting the Create Target button.
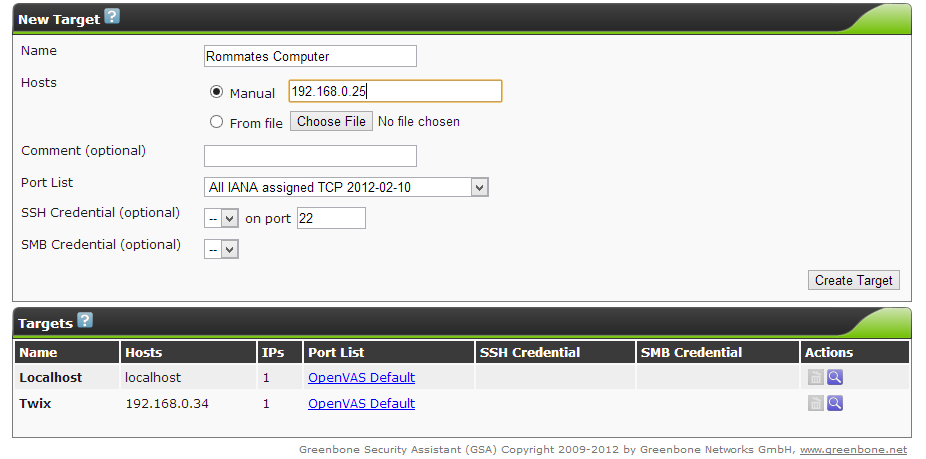
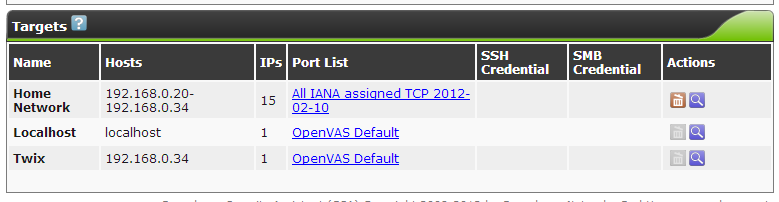
- The new target will be visible in the box below the form once successfully created. Make sure OpenVAS has a value under the IPs column. This is to ensure it found the target IP address or addresses.

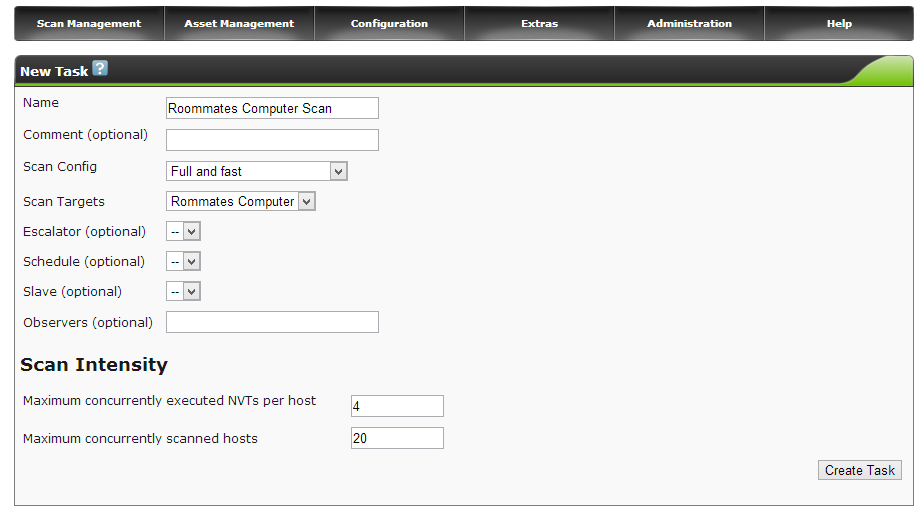
- Now it is time to create a task to scan the new target. Hover over the Scan Management tab then select New Task.
- Fill out the new task field with the desired task details. In the picture below, I only entered into the form a task name and selected a target to scan, everything else I left as default for a full and fast scan (you can experiment around with the settings for a more detailed scan). When you are finished entering in all the details, create the task by selecting the Create Task button.
- The task will now appear in the task window and is ready to start. OpenVAS will not automatically start a task, you must select the green start icon under the Actions column in the task window to begin the scan. The other actions found in this column provide easy task management for when you want to start, pause or resume a task in order to pace server activity.
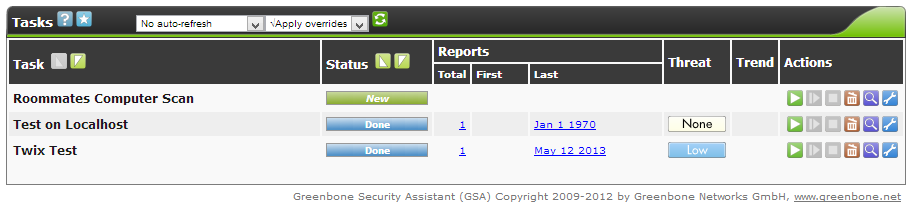
- The scan will take a bit of time so be patient. If you want to view the progress of the scan, you can change the drop box settings above the task box to refresh ever X seconds and to no overrides. With these settings, the page will refresh every so often to notify you of the task progress under the Status column in the task box. Sometimes the task may stop itself, you can resume it by selecting the icon next to the start arrow under the Actions column.
- When the status of the scan shows Done, you can review the scan findings. Select the coordinating task date under the Last column. A summary of the report will be presented along with the capabilities to download a more detailed version of the report.
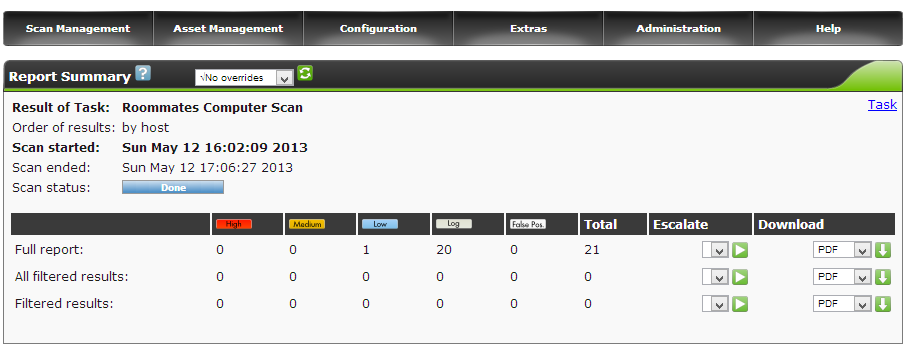
- There you have it, you can review the findings in the report to learn of possible vulnerabilities in a host. Good luck!
I wish I was as cool as you were K Babe. Just one second in your presence takes away the pains of life and fills me with everything that is good and wonderful.
Hello, Helpful indeed.
However is it possible to add multiple selective targets in single task?
Thanks
yes, add the IPs in text file and import it.