SSL Encryption for Django’s Local/Native Server

Django comes packaged with a lightweight python server. It is not intended to be a production server but more a testing/development host. Running the server is as easy as running the following command within a Django project:

python manage.py runserver

Since it’s so lightweight, it doesn’t come with the same abilities as other servers like Apache or Nginx. It can’t perform encryption, however, there’s a nifty tool called stunnel that can do it for you!

“Stunnel is an open-source multi-platform computer program, used to provide universal TLS/SSL tunneling service” (Wikipedia).

Environment

The following steps were performed on my iMac running OS X Mavericks with a Django 1.5 installation. I believe my instructions should still work for different versions (most) and Linux distributions.

Steps

Initially, I downloaded the latest version of Stunnel, however I ran into numerous compiling issues. One of them being: “ld: warning: directory not found for option ‘-L/usr//lib64.’” The error indicated I did not have the necessary 64x library. When I downloaded version, 4.54, everything compiled nicely.

  • Download the stunnel-4.54.tar.gz source code.
  • Open a terminal window and run the following command to untar (unzip) the file.
 tar –xvf stunnel-4.54.tar.gz
  • Run the following commands to enter the directory and install the tool (credit).
cd stunnel-4.54
./configure && make && make check && sudo make install
  • During the install stage, you will be required to enter in certificate data. Stunnel will conveniently make a self-signed SSL certificate for you and save it to /usr/local/etc/stunnel/stunnel.pem. Thanks Stunnel!
  • Create a configuration file for Stunnel (credit). I put the file inside my Django project to keep things organized.
vim dev_https
  • Edit the file and add the following lines in order to manipulate Stunnel to work with your environment.
pid=
cert=/usr/local/etc/stunnel/stunnel.pem
foreground=yes
debug=7
[https]
accept=<HTTPS ACCEPTING PORT>
connect=<LOCAL PORT YOUR DJANGO SERVER IS USING>
TIMEOUTclose=1
  • Save the file (For vim: ESC ‘:wq’ ENTER).

config

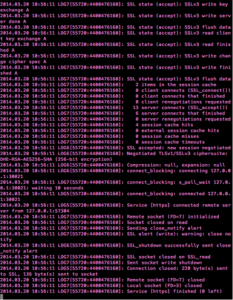
  • Start the Stunnel HTTPS tunneling service.
sudo stunnel <PATH OF dev_https>

stunnel
  • Next, start your Django server.
python manage.py runserver 127.0.0.1:< LOCAL PORT YOUR DJANGO SERVER IS USING>

django

Note – I used 127.0.0.1 purposefully as my hosting IP address, I only want Django to run locally. I do not want the server to run on a public/accessible IP.  Only stunnel will receive web requests.

That’s it! Now stunnel is listening for all encrypted, incoming messges on whatever port you specified. When a request comes in, it will decrypt it and send it locally to your Django server. Following, Django will then respond through the tunnel to the requesting client with the proper data.

Stop the MitM Attacks! Use Encryption!

So I’ve been having fun with Amazon’s Developer Services for user authentication. In order to get the darn thing working, Amazon requires your server to use HTTPS. This isn’t a bad thing but in order to have HTTPS, you need to get a valid certificate. Now it’s easy to create a certificate (see below) however, not as easy to get a trusted certificate. Trusted certificates are those that are authenticated by a Certificate Authority or CA. I wouldn’t really trust a self-authenticated certificate. Reminds me of online dating where everyone lies, you kind of want a third party, reliable source to tell you the truth.

lafawnduh

Here is the process to create a certificate request or CSR:

The below uses Openssl (this is native on a lot of Linux distributions, IIS on Windows handles these things differently).

Generate a RSA encrypted private key

openssl genrsa –out gen.key 2048

Create a CSR for the key

openssl req –new –key gen.key –out key.csr

Answer all the questions, leave the password blank, it’s not needed.

To get it approved:

Self (Untrusted…lame)

Remove RSA passphrase, if you don’t, the server you are running will require it upon each request

openssl rsa -in gen.key -out server.key

Generate a Year Long Certificate

openssl x509 -req -days 365 -in key.csr -signkey server.key -out key.crt

Trusted

Take it to a company such as Verisign, Thawte and RapidSSL.

Wrap it Up

You now have a certificate that can be included in your server configuration. Check your documentation for the correct implementation. There are too many server variations out there for me to describe the process.

So why do we care about HTTPS?

Well it’s secure! HTTPS stands for Hypertext Transfer Protocol Secure and utilizes SSL/TLS protocol to lockdown communications. It is used to prevent man-in-the-middle attacks with the use of encryption (preventing some of the attacks in the ettercap post). If your data is encrypted, little hacker man can’t read it. This is why whenever you are entering in confidential information, look for “https://” in the URL, else your private data is being broadcasted in clear text (there was an ettercap attack mentioned in my last post that removed the security from a Facebook form, changing the login URL from HTTPS to HTTP… be warned).

Explanation of the SSL/TLS process:

  1. Client browses to a secure site (HTTPS)
  2. Hosting server sends its certificate and public key to requesting client
  3. The client’s browser checks the server’s certificate (Looks to see if it comes from a trusted CA, relates to the correct sire, and is currently valid) – This is why you should pay attention to browser warnings, it may be trying to prevent you from going to an untrusted site.
  4. The browser uses the public key to encrypt a random symmetric encryption key and sends it to the server
  5. The server decrypts the key using its private key, the following communication between hosts is encrypted with the symmetric key
  6. Once communications have concluded, the symmetric key is discarded

The Public Key is available to anyone and anything that wants it. Anyone can retrieve it from the server. That’s all fine and dandy. The Private Key, on the other hand, is kept a secret and only the owner knows it. These keys are mathematically related, whatever is encrypted with a Public Key can only be decrypted by its corresponding Private Key. So even though a hacker can get the Public Key, he/she cannot decrypted the SSL/TLS communications because they do not have the Private Key.

So here is an example of how it all works. Jack wants to send a secret message to Jill, he doesn’t want anyone else to read the message. So Jack,encrypts his message with Jill’s Public Key. Jill is cool with giving out her Public Key to anyone who wants it because it is after all public. Jill is the only person who can decrypt the Public Key because she is the only one with its corresponding Private Key. So now Jack’s message can only be read by Jill. Even if hacker Todd gets a hold of the encrypted data, he can’t read it because he doesn’t have the decryption or Private key.

Crazy security…

BitLocker Enable Pin Windows 8

So from my earlier post, I choose to enable BitLocker encryption. For the more paranoid users, there may be a desire to intensify security.

After I went through the excruciating long wait for my drives to finish encrypting, I wanted to enable pin authentication on startup. I thought this would automatically be enabled but for me it wasn’t.

The process for this was super easy but a simple search did not render any useful documentation so I figured I would just post how to do it.

The first part of the process required editing the Windows Group Policy. Group policies are awesome, definitely worth exploring! “Group Policy provides the centralized management and configuration of operating systems, applications, and users’ settings in an Active Directory environment” (Wikipedia).

In Windows 8, simple search or type “group policy” on the startup page. Select “Edit group policy.”

Find Group Policy

From the tree on the left of the policy window, go to:

Local Computer Policy -> Computer Configuration -> Administrative Templates -> Windows Components -> BitLocker Drive Encryption -> Operating System Drives

Group Policy


Open the setting, “Require additional authentication at startup.”

Addition BitLocker Security

The only change I made was to enable the authentication setting, I kept all default settings. Be aware, this may not be ideal for users who do not have TPM because the machine might expect a USB key which is a pain to require for each startup. TPM stands for Trusted Platform Module and version 1.2 can be found on most Windows systems older than 2011.

After changing the group policy, force your computer to update by running the command:

gpupdate

Lastly, go into BitLocker management and edit the startup setting from the “Change how drive is unlocked at startup” option. Add a pin or whatever else to beef up your security.

BitLocker Menu

Complete.

Hard Drive Encryption

On a totally different encryption tangent, I need to encrypt my hard drives. Kind of ashamed that they aren’t encrypted already… I studied the field of cyber-security. However, for a basic home server it didn’t seem as pertinent to encrypt my drives.

I’m not going crazy or anything with confidential data. However, something really cool with hard drive encryption is that in most cases (strong password utilized, best practices, etc.), if the user is not logged into the computer at the time of seizure, it can be close to impossible (at the moment of writing this) for forensics to decrypt the data. True, there are tools that are part of the FTK toolkit like PRTK that can be used to attempt to decrypt your hard drive. Now correct me if I’m wrong, but if your password is over 12 characters long and includes different characters, numbers, symbols and all that jazz, the decryption attempt will take forever! The investigators are likely to be long gone before anything is returned (the cracking system would also have to be amazing and last just as long).

There are primarily two types of encryption, hardware and software encryption. I prefer the idea of hardware encryption, it encrypts data at the lowest level and tends to be more secure. If someone has access to your environment with a software encryption scheme there is a greater likelihood they will be able to obtain the key through brute force. A simple reference site for an explanation of encryption and the differences can be found here. One uses the computers resources to encrypt while the other relies on the hardware to encrypt data on its own dedicated processor. There really isn’t much difference between performance, problem is not all hard drives come with a dedicated processor for encryption.

My environment consists of three 4 TB hard drives in a RAID5 array that are currently partitioned into two drives. One drive contains Windows 8 and the other is for storage.

The hard drives I'm currently using.
The hard drives I’m currently using.

So my options, hardware or software encrypt. I’ve already been using the drives for quite some time, I don’t really want to lose the data already stored on the devices. There are some issues I foresee with hardware encryption and a RAID system. Is it even possible with RAID? I have to concern myself with how encryption will affect the stripping and mirroring of data. It all depends on the drive and in my case, its easy, my hard drives don’t even include the capability to hardware encrypt so on to software encryption.

For software encryption, BitLocker and TrueCrypt are two free solutions that I am familiar with and could consider using. I could also look at converting my entire system into a NAS (FreeBSD and FreeNAS can setup a software based RAID and they include encryption capabilities) but… I’ll save that for another day.

BitLocker is already made available on Windows 8 Enterprise and Ultimate, but is it better than TrueCrypt? According to Tomshardware.com, both encryption tools are almost identical in performance. Bottom line, Microsoft’s BitLocker apparently has a few advantages via Intel’s new AES extensions. Despite this, TrueCrypt gives is compatible with non-Windows environments and it allows users to create “secret” partitions. These partitions are totally hidden and are only accessible from the TrueCrypt passphrase screen.

Mmm I think I’ll explore both options. BitLocker is quite easy to setup. From the start screen, type in BitLocker and there it is!

Finding BitLocker

Select to turn on BitLocker and follow the wizard instructions. It’ll take a couple restarts to get things going followed by a long, long wait.

BitLocker

Easy Sauce!

TrueCrypt is slightly different. The install demonstrated was performed on a MacBook Pro with Mavericks installed.

I couldn’t encrypt the working hard drive because it was in use, kind of defeats the purpose of what I was attempting however, I was able to create a hidden/secret partition. So I’m just going with that.

After starting up TrueCrypt, select to “Create Volume.”

TrueCrypt Main Menu

Follow the wizard directions to “Create an encrypted file container.”

Encrypted File Container

Following, select “Hidden TrueCrypt volume.”

Hidden Drive

Select a file location for the TrueCrypt volume. This volume will appear as a file which can then be mounted by the TrueCrypt software. Once mounted, it can be accessed just like another filesystem with directory trees, files, etc.

Choose whatever encryption algorithm works for your environment, testing is always a good idea.

Outer Volume Encryption Options

The Outer Volume Format window is slightly peculiar, you just mouse around the window a lot to create a random key sequence.

Outer Volume Format

After selecting, “Format,” the outer volume for the hidden/secret partition will be created. This volume contains the hidden and can act as a decoy. The wizard continues with the hidden volume creation.

Screen Shot 2014-01-02 at 6.57.22 PM

It’s basically identical to the earlier, outer volume process.

Now to access the two volumes, open TrueCrypt and mount the file you created. You can either enter in the password for the hidden or decoy volume depending on which on you want to access.

TrueCrypt Password Prompt

So why this outer volume/hidden volume setup? Say, somehow, someone knew you had the TrueCrypt volume and they were forcing you to provide the password. Well, thank goodness you have a decoy! They’ll think they’re getting the goods when really you are only supplying them with decoy files, while the hidden ones lay secretly nestled inside the decoy undetected.

Wow, what a long post but there you have it, the joys of encryption!