BSOD Windows 8.1

So even after a fresh install, I was still getting Blue Screens of Death (BSOD). I only started receiving these issues after I upgraded to Windows 8.1 from 8. So I narrowed my speculations down to driver issues. This post describes the steps I took to analyzing the BSOD and my conclusion/solution.

Analyzing a Blue Screen

Screenshot (37)

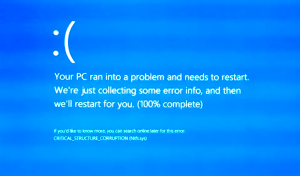
I received the pictured blue screen consistently on my machine. Looking at the error I noticed the “CRITICAL_STRUCTURE_CORRUPTION.” Search results for the error greatly varied… and weren’t particularly helpful.

Okay, so I then chose to look at the Window Event Logs. For Windows 8.1, you can get to the event viewer by clicking the bottom left start icon on the lower left of the desktop view and selecting the tool or by searching for it.

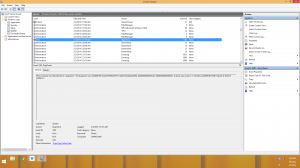
In the Windows Logs->System log there was an error that listed a memory dump created after the computer recovered from one of the many blue screens. I deduced that this dump may have some clues to what caused the problem.

EventViewer

Next, I decided to use windbg. This is a debug tool for analyzing Windows that can be used to read the memory dump file. You can download the standalone tool from here.

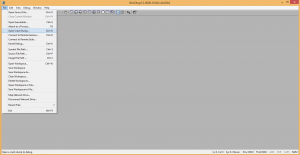
After installing the tool, I accessed the executable at <INSTALL DIRECTORY>\Windows Kits\8.1\Debuggers\x64\windbg.exe (x86\windbg.exe for 32 bit machines). With the tool running, I opened the memory dump file path found in the earlier viewed event.

Open

This tool spit out some information found in the dump file.

dump

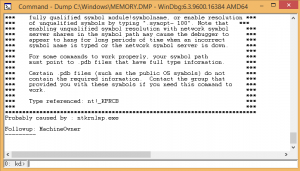
Hmmm… it wasn’t so helpful, basically said there is a problem most likely due to ntkrnlmp.exe or in other words some kernel activity. I needed a symbol table to make sense of some of there references in the dump file.

I entered the following command in the prompt at the bottom of the dump report window to download the latest symbols:

.sympath SRV*<LOCATION TO DOWNLOAD eg f:/Temp>*http://msdl.microsoft.com/download/symbols

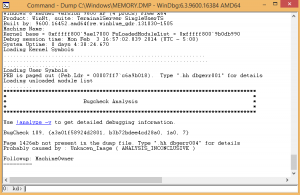
I selected Debug->restart to rerun the debug on the memory dump file with new symbols. I then received the following results pictured below.

after

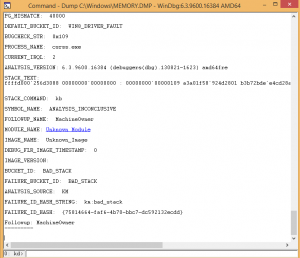
Still doesn’t help much in describing what is causing the blue screens. To further investigate, I clicked on the analyze link. This expanded the analysis results.

analyze

Okay, so I can definitely now see that there was a memory issue by the reference to a bad stack… but I don’t know what caused it. Clicking on the link under MODULE_NAME didn’t provide much.

lmvm

Well, I then did a search on lmvm Unknown Module. After looking through the results, I found a couple posts that mentioned conflicts between some of the Intel drivers and Windows 8.1.

Conclusion/Solution

I have an Intel motherboard and Intel drivers. I became suspicious…

Naturally, I decided to uninstall the Intel HD and network drivers from “Programs and Features.”

No blue screens as of yet. Make sure by default Windows is not set to update drivers automatically. I consider it solved… for now. I await new drivers from Intel.
Intel RAID 5 on Windows 8.1

I upgraded by Windows 8 to Windows 8.1 a couple of months ago and since the change I was getting blue screens (of death…) consistently.

This issue was do to a piece of memory that was incorrectly over written, my RAID drivers were also failing. There really wasn’t anything important on my Windows partition so I decided to delete the partition and reinstall Windows 8.1 as a fix. There are helpful debugger tools to deal with this along with memory tests but it was just as easy for me to delete and start over.

The following instructions apply to an Intel Motherboard.

Enabling RAID (I already had my RAID setup, so I didn’t need to perform these steps since it is configured on the hardware level.)

  1. Turn on the computer and during the first screen that  flashes the manufacturer name (the screen before the Windows logo) enter the BIOS menu. The screen flashes quickly and for those who don’t know how to enter this screen, it’s normally a F key. The manufacturer screen normally has on it a list of  key options, just look for the one that will get you to the BIOS configuration (Don’t worry if you miss it, just keep shutting down the machine and turning it back on until you get it). For me, the Intel key was “F2”.
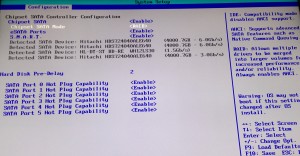
  2. Under the configuration tab in the BIOS, set the “Chipset SATA Mode” to RAID. Directions on how to change values are displayed on the right hand side of the screen.
  3. Save changes and exit the BIOS screen (ESC key).
2014-02-01 09.43.41
BIOS Configuration Tab

Configuring RAID Volumes (Once again I already had this setup.)

  1. Reboot the computer. There should now be an additional screen that appears between manufacturer screens when you start the machine up. This lists all your RAID volumes.
  2. Quickly, press CTRL-I to get to the RAID configuration utility while the screen is up. This was actually tricky for me, I had to make multiple attempts. For some reason, I could not get this to work on my bluetooth keyboard but it worked with another keyboard… some bug. Even with a different keyboard, I basically held down CTRL and went crazy pressing “i” over and over and over again.
  3. In this window you can create RAIDS! Choose option 1 to create your volumes or look at the other available options for different functions.
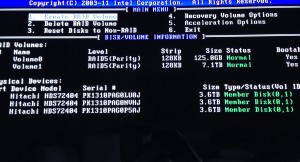
  4. My settings consist of two bootable RAID 5 volumes across my three ~4TB (3.6TB actual) hard drives. One with 125GB and the other with 7.1TB. The screenshot below shows my setup for your reference. Depending on your setup (RAID 5 requires at least 3 hard drives), you may want to do some research into RAID and your options. I chose 5 because it is supported by my motherboard and provides mirroring/striping. So it optimizes parallel communications and provides redundancy. In the case that one of my hard drives fails, I won’t loose anything. If two hard drives fail… I’m screwed. Basically, you have some protection from failure but still replace bad hard drives ASAP.

2014-02-01 10.22.15

Install Windows

Intel Raid Driver I Used

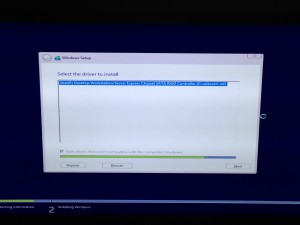
  1. Download the Intel RAID drivers from their website and put them on a USB device. The screenshot above shows the driver I downloaded. Keep the USB plugged in during the following steps.
  2. I had a DVD with a Windows 8.1 ISO burned to it. This was placed into the computer before I shut it down. I then turned the computer on and again during the manufacturer/first screen, I hit the “F10” key to select from where to boot. Most of the time, by default you boot from the Windows partition on your hard drive. However, this time, I wanted to boot from my install DVD containing Windows 8.1.
  3. It took awhile to load the Windows menu, but once it did, I chose to “Install.”
  4. The next few screens deal with entering your license key and junk.
  5. Once I was prompted for Default or Advanced setup. I chose Advanced. This was because I needed to mess with the partitions.
  6. The next screen will show the existing partitions but we have RAID going on and to make the install aware of this, we need to provide the drivers. In the current window, look for and select “Load driver.”
  7. I pointed the device to my USB to search for drivers. Once it found my Intel RAID driver, I selected it and clicked “Next.”
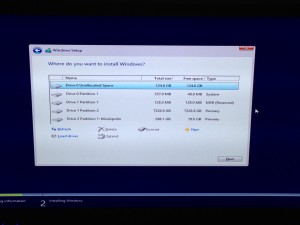
  8. After a few minutes, you will be returned to the partition window and you should see you RAIDs correctly.
  9. Format a new partition for your Windows (I deleted the previous). In my setup, I have 8 TB of hard drive space. I dedicated 124 GB to my Windows partition and the remainder to a partition I call “cabinet.” This is where I store my documents, media, etc. Windows does have a problem with creating a partition greater than 2TB. These drives must use GPT. This page discusses more on GPT. If this is what you plan to do, don’t partition the larger now, wait to use the Windows disk utility described in the link.
  10. Continue and let Windows install. Was completed, install drivers as needed. Intel has a tool that helps with this process.
2014-02-01 01.13.18
Driver Selection
2014-02-01 01.13.21
Partition Window

There you have it!