Build Your Own Wireless Access Point
Why buy an expensive router when you can build a cheap one from old hardware?
Equipment
This is what I used:
- Ubuntu Desktop 12.04
- hostapd v0.7.3
- dhcp3-server
- HP Compaq DC 7800 Small Form Factor PC
- Penguin Wireless N PCIe Card v3 SKU NPCIEV3 ($50-$70)
- Ethernet cable
- Monitor, VGA cable, mouse and keyboard
Setup
Hardware
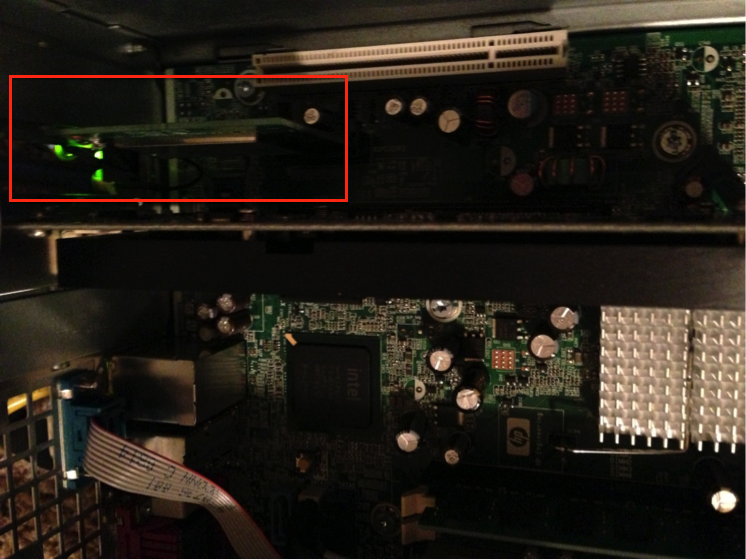
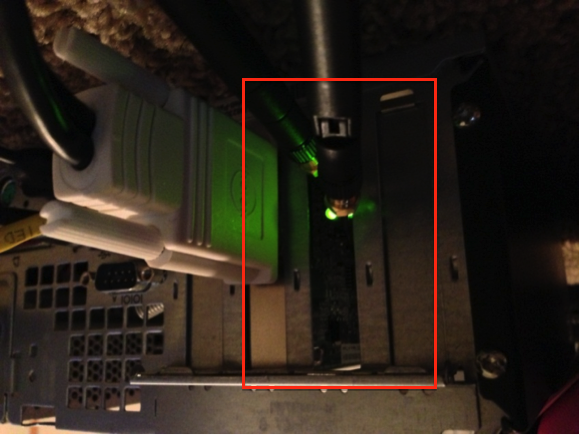
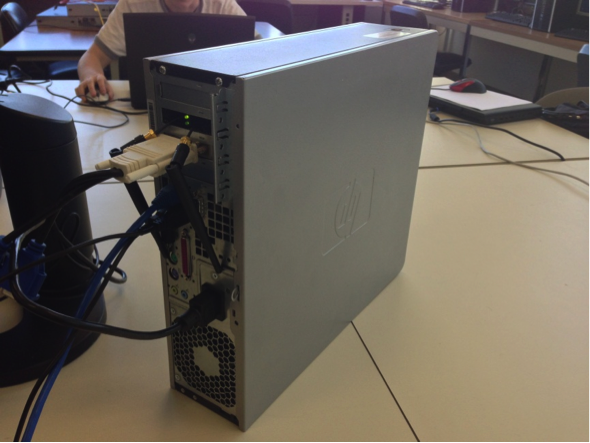
- The Wireless network card must first be installed. Open up the computer and locate the PCI slot. Insert the network card into the PCI slot.
- Ensure the two cables are reachable to the outside of the case. The antennas should be connected to these points. In the picture, the wireless network card’s plate did not fit the chassis and was removed because I didn’t feel like punching holes through the original plate.
Software Install
These directions specifically apply to a machine that is running the Ubuntu 12.04 operating system. I feel this goes without mentioning but have a monitor, keyboard, etc connected to the PC for the next install steps. Install SSH in order to shell into the device later without all that necessary crap. In order to create the wireless access point two packages need to be installed.
- sudo apt-get install hostapd
- sudo apt-get install dhcp3-server
Hostapd provides the hosting services of an access point. It is a daemon for wireless access and authentication servers. Dhcp3-server provides a network service that automatically assigns IP addresses to clients.
Configuration
The hostapd configuration file needs to be created and edited to contain access point information. The below settings utilize WPA2-PSK authentication.
- sudo vim /etc/hostapd/hostapd.conf
- Add
- Configure the interface for the DHCP server.
- Set
- The next configuration is in the DHCP conf file. Set the range of IP addresses allowed to be allocated to connecting machines.
- Comment out all lines except:
- Declare the IP range of addresses for DHCP.
- Enable the hostapd program to run on startup.
- Set:
interface=wlan0 #wireless network interface
driver=nl80211 #802.11 standard
ssid=TheShire #The hotspot name, I'm a sucker for Lord of the Rings :)
country_code=US
channel=11
hw_mode=g
auth_algs=1
wpa=3
wpa_passphrase=secretPassword #access point password
wpa_key_mgmt=WPA-PSK
wpa_pairwise=TKIP CCMP
rsn_pairwise=CCMP
sudo vim /etc/default/isc-dhcp-server
INTERFACES=”wlan0″
sudo vim /etc/dhcp/dhcpd.conf
ddns-update-style none;
subnet 10.10.0.0 netmask 255.255.255.0 {
        range 10.10.0.2 10.10.0.24;
        option domain-name-servers 192.168.0.81, 192.168.0.4;
        option routers 10.10.0.1;
}
sudo vim /etc/default/hostapd
RUN_DAEMON="yes"
DAEMON_CONF="/etc/hostapd/hostapd.conf"
DAEMON_OPTS="-dd"
IP Settings
- Configure the IP settings for the wireless network.
- Add
sudo vim /etc/network/interfaces
auto lo
iface lo inet loopback

auto wlan0 #Wireless Network Interface
iface wlan0 inet static
address 10.10.0.1 #Local Router IP
netmask 255.255.255.0
Firewall Settings
Allow IP masquerading in the Iptables. This is a networking function that allows local machines to access the same connection the host router is utilizing.
- echo “1” > /proc/sys/net/ipv4/ip_forward
- iptables -t nat -A POSTROUTING -o eth0 -j MASQUERADE
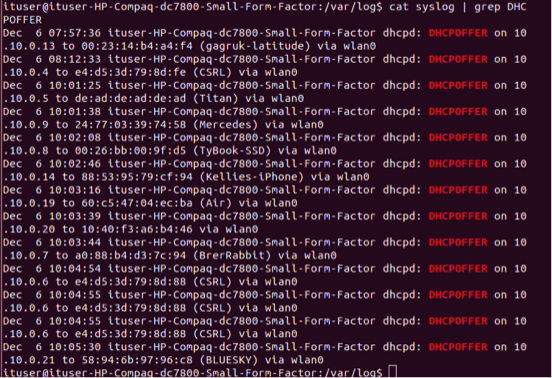
DHCP Monitoring
- All DHCP requests can be found in /var/log/syslog. Grep can be used to pull certain requests for monitoring.
- Further DHCP settings can be supplied in the configuration file, such as:
- Edit
cat /var/log/syslog | grep DHCPOFFER
sudo vim /etc/dhcp/dhcpd.conf
subnet 10.10.0.0 netmask 255.255.255.0 {
        range 10.10.0.2 10.10.0.24;
        option domain-name-servers 192.168.0.81, 192.168.0.4;
        max-lease-time 120; #Set the max release time
        default-lease-time 120;#Set the default lease time
        option routers 10.10.0.1;
}
To flush the DHCP leases, the following can be performed:
- cd /var/lib/dhcp/
- sudo rm dhcpd.leases~
- sudo echo “” > dhcpd.leases
Changing Signal Strength
It may be ideal to limit the signal strength to a specific room or region in order to prevent overlapping signals. For cards that support multiple transmit powers, this can be done through iwconfig.
- iwconfig wlan0 txpower <LEVEL IN DBM>
There you have it!