Compiling Mesa 7.9.1 Error: brw_program.c:39:20: error: talloc.h: No such file or directory

Error

I received the following error while configuring mesa version 7.9.1 from its source code (running ./configure).

Error: “brw_program.c:39:20: error: talloc.h: No such file or directory”

Mesa compile error
Solution

To solve this issue, I added a statement to the ./configure line that added talloc’s include directory into the CPPFLAGS.

CPPFLAGS="-I<PATH TO TALLOC INCLUDE DIRECTORY>" ./configure

Make sure to keep the “-I” before the path with no spaces between them. I had talloc installed in a unique location, with a different prefix than the norm. Mesa wasn’t looking in the right places for it. To provide mesa with the correct path, I added it into CPPFLAGS. These flags are used to define include directory paths for the compiler.

Compiling ParaView v4.1.0 Error: libXi.so undefined reference to `_XGetRequest’

Error

While compiling ParaView from the source files, I ran into the following error while running the ‘make’ command.

…libXi.so undefined reference to `_XGetRequest'
make[2]: *** [bin/icetTests_mpi] Error 1
[ThirdParty/IceT/vtkicet/tests/CMakeFiles/
icetTests_mpi.dir/all] Error2

Solution

In my case, the X11 libraries were installed separately and were located in custom directory locations that differed from the default. I fixed this error by checking and correcting the paths for my X11 libraries and include directories within the ccmake configuration menu. The error was then fixed during the next ‘make.’

Compiling ParaView v4.1.0 Error: couldn’t connect to server

Error

I received the following error while trying to compile ParaView from source.

http://www.vtk.org/files/ExternalData/MD5/
7dc839fb2825efa8c55e4275fee02a75 ("couldn't connect to server")

ParaView Compile Error

For some reason, the requested files could not be pulled from the server. You may have proxy issues or restricted internet access.

Solution

Manually download all MD5 files from http://www.vtk.org/files/ExternalData/MD5/ and place into your ExternalData/Objects/ within the build directory.

Compiling ParaView v4.1.0 Error: error: X11/SM/SMlib: error: X11/StringDefs.h: No such file or directory

Error

After using ccmake to configure ParaView options, I received the following errors while running ‘make.’

In file included from ...X11/Shell.h:51:26: error: X11/SM/SMlib.h: 
No such file or directory

and

...VTK/Rendering/OpenGL/vtkXRenderWindowInteractor.h:39:73: 
error: X11/Intrinsic.h: No such file or directory

and

In file included from ...Wrapping/ClientServer/
vtkXRenderWindowInteractorClientServer.cxx:6:
VTK/Rendering/OpenGL/vtkXRenderWindowInteractor.h:38:74: 
error: X11/StringDefs.h: No such file or directory
VTK/Rendering/OpenGL/vtkXRenderWindowInteractor.h:39:73: 
error: X11/Intrinsic.h: No such file or directory
In file included from ...Wrapping/ClientServer/
vtkXRenderWindowInteractorClientServer.cxx:6:

ParaView Error: Missing header

Solution

These issues were due to my libraries being installed in custom locations. Double check all paths supplied in the ccmake configuration and try copying the libxt (X11/all file contents), ICE (X11/ICE), SM (X11/SM) library directories into VTK/Rendering/OpenGL/X11 within your build directory. The error occurred because the compiler could not find the requested libraries.

Linux – Compiling Downloaded Source Code with Make’s 101

I’ve been doing quite a bit of source code compiling using the “make” command and figured I provide a brief primer on how to compile.

DISCLAIMER – Not all source codes are the same, some may/may not follow this structure.

First step, download the source code you wish to compile. For this example, I will download cmake 3.0. The tool can be downloaded from: http://www.cmake.org/files/v3.0/cmake-3.0.0.tar.gz.

Untar the file, the following command will work when executed from the same directory the tar file is located.

tar -xvf cmake-3.0.0.tar.gz
Screen Shot 2014-07-28 at 9.50.37 PM

Next, change directories into the newly tar-ed folder (the source code directory).

cd cmake-3.0.0

The following commands need to be executed within the source directory. Some source codes have and autogen.sh file. If this exists, run it to auto generate the correct configure.

./autogen.sh

However, if there is already a configure file (note this is not configure.<EXTENSION>), run that to check and setup your environment.

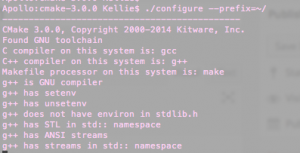
./configure

The command

./configure --help

will show you the manner different setup variables you can assign values. For example, if you do not want the source code to be compiled in default directories, add the –prefix flag to specify another directory.

./configure –prefix=<DIRECTORY FOR INSTALL>
Screen Shot 2014-07-28 at 9.52.33 PM

Some sources require you to run

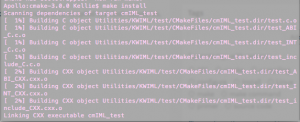
make

first to run/setup default variables. However, I normal just run

make install
Screen Shot 2014-07-28 at 9.58.47 PM

in most instances, after configuring.

That’s pretty much it! It is compiled and ready to go. Happy coding!

SSL Encryption for Django’s Local/Native Server

Django comes packaged with a lightweight python server. It is not intended to be a production server but more a testing/development host. Running the server is as easy as running the following command within a Django project:

python manage.py runserver

Since it’s so lightweight, it doesn’t come with the same abilities as other servers like Apache or Nginx. It can’t perform encryption, however, there’s a nifty tool called stunnel that can do it for you!

“Stunnel is an open-source multi-platform computer program, used to provide universal TLS/SSL tunneling service” (Wikipedia).

Environment

The following steps were performed on my iMac running OS X Mavericks with a Django 1.5 installation. I believe my instructions should still work for different versions (most) and Linux distributions.

Steps

Initially, I downloaded the latest version of Stunnel, however I ran into numerous compiling issues. One of them being: “ld: warning: directory not found for option ‘-L/usr//lib64.’” The error indicated I did not have the necessary 64x library. When I downloaded version, 4.54, everything compiled nicely.

  • Download the stunnel-4.54.tar.gz source code.
  • Open a terminal window and run the following command to untar (unzip) the file.
 tar –xvf stunnel-4.54.tar.gz
  • Run the following commands to enter the directory and install the tool (credit).
cd stunnel-4.54
./configure && make && make check && sudo make install
  • During the install stage, you will be required to enter in certificate data. Stunnel will conveniently make a self-signed SSL certificate for you and save it to /usr/local/etc/stunnel/stunnel.pem. Thanks Stunnel!
  • Create a configuration file for Stunnel (credit). I put the file inside my Django project to keep things organized.
vim dev_https
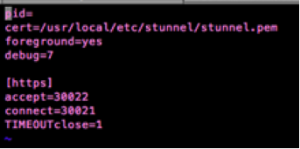
  • Edit the file and add the following lines in order to manipulate Stunnel to work with your environment.
pid=
cert=/usr/local/etc/stunnel/stunnel.pem
foreground=yes
debug=7
[https]
accept=<HTTPS ACCEPTING PORT>
connect=<LOCAL PORT YOUR DJANGO SERVER IS USING>
TIMEOUTclose=1
  • Save the file (For vim: ESC ‘:wq’ ENTER).
config

  • Start the Stunnel HTTPS tunneling service.
sudo stunnel <PATH OF dev_https>
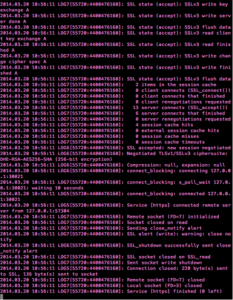
stunnel
  • Next, start your Django server.
python manage.py runserver 127.0.0.1:< LOCAL PORT YOUR DJANGO SERVER IS USING>

django

Note – I used 127.0.0.1 purposefully as my hosting IP address, I only want Django to run locally. I do not want the server to run on a public/accessible IP.  Only stunnel will receive web requests.

That’s it! Now stunnel is listening for all encrypted, incoming messges on whatever port you specified. When a request comes in, it will decrypt it and send it locally to your Django server. Following, Django will then respond through the tunnel to the requesting client with the proper data.

What’s the Diff?

I’ve been doing a log of programming at work and some of the worst errors to run into are segfaults or segmentation faults. This deals with problems in your logic and more often then not is a memory issue. They really suck to debug…

For best practices, I keep a working version and development version of code. This way, when I run into these problems I can compare my issues against a working copy. I use none other than the great diff command. This sometimes helps with faults among other debugging tools like (gdb).

It’s pretty obvious by the name what this command does, it points out the differences between files.

Command:

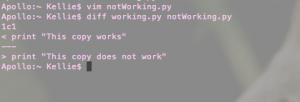
diff <FILE 1> <FILE 2>

Screen Shot 2014-01-31 at 9.03.04 PM

The example points out a line that is different between two given files. New lines can really screw up the results so be careful.

That’s the gist, visit the it’s man page for more details.

Happy Programming!

Type-Safe vs Dynamically Typed Programming Languages

So a lot of my posts include Python code. Python is a powerful, dynamically typed, free application programming language.

Programming languages are either type-safe or dynamically typed. One setting isn’t necessarily better than the other. It all just depends on your project and what you are trying to accomplish.

Type-Safe (Statically typed)

A variable type (int, unsigned int, double, float, etc.) must be explicitly stated when a variable is declared. The variable is fixed at compile time which allows the compiler then uses this supplied information to ensure the right data is used in the right context. Languages such as C, C+ and Java are type-safe.

Pros:

  • Less bugs (There is no chance of misreading a variable)
  • Safer programming
  • Easier to manage complexity in large projects (Everyone is aware of types and their purpose)
  • More control over types (You state the type, you are in control over exactly how the compiler sees it)

Cons:

  • Decreased flexibility
  • Not as recyclable (It’s not as easy to reuse your code for multiple purposes)

 Good For:

  • Complicated algorithms and data structures which require strict low-level controls
  • Memory sensitive large dataset manipulation
  • Well-defined functions that are likely not to change much over time
  • Large development teams

Dynamically Typed

Variables are not declared with a given type. Types are basically determined by the compiler. These languages normally include extensive run-time checks to prevent most type errors.

Pros:

  • Very flexible
  • Easily Recyclable
  • Quick development speed and turn-around time
  • Reduces amount of overall code leading to possible reduction in bugs

Cons:

  • Can have some undesirable effects on the code (If the wrong type is understood in a situation, some funky things can happen)
  • More prone to human failures such as typing errors (Say you mistyped a variable, it might be seen as a new variable all together in a dynamic setting)
  • Decreased efficiency due to run-time checks

Good for:

  • Connecting different components or languages together
  • Creating graphical user interface
  • Text manipulation (Concatenating, regular expressions, search, etc.)
  • Ever changing code
  • Small segments of CPU-time intensive work
  • Automatic memory administration
  • Web server communications
  • Consistent performance across OS platforms (meaning I can run the script the same on Windows, OSX, Linux, Unix etc.)

Not to Be Confused With… 

In addition, there is also something known as weakly and strongly typing (totally different concept from the type-safe/dynamic stuff). This refers to one type being able to be used as another type. A strong language will not let a string all of a sudden act as an integer. A weak language will allow this, mostly due to unintentionally loopholes. Languages such as Pearl and C are known for being weakly typed while Python is a strongly typed language.                     

People will argue one over the other, similar to the whole Mac vs PC debate, in reality both benefit and serve different programming objective purposes.